

 Thanks: 0
 Likes: 0
 Needs Pictures: 0
 Picture(s) thanks: 0
Results 1 to 15 of 20
Thread: Adelaide fishkeeper
-
9th September 2010, 03:11 PM #1
 Novice


- Join Date
- Sep 2010
- Location
- Warradale, Adelaide
- Posts
- 8
 Adelaide fishkeeper
Hi Guys,
I've started looking at the forum and realized that I don't even know where to start!
I'm in the process of teaching myself to make plywood aquariums. I'm starting small by building a 300 liter filter box out of plywood. My end goal is it build a 7,000+ liter aquarium out of wood to be the feature of my house.
I haven't assembled anything more challenging than IKEA furniture but I'm sure I can learn.
I hope this forum will have plenty of useful information. I'm messing around with screwing scrap plywood together and already I'm having trouble getting things strait... I have a lot to learn!
-
9th September 2010, 04:57 PM #2
GOLD MEMBER
- Join Date
- Mar 2007
- Location
- Munruben, Qld
- Age
- 83
- Posts
- 0
Hi and welcome to out little corner of the world.
 Reality is no background music.
Cheers John
-
9th September 2010, 05:38 PM #3
Skwair2rownd
- Join Date
- Nov 2007
- Location
- Dundowran Beach
- Age
- 76
- Posts
- 0

G'day Griller and welcome to cuber heaven!!
Straight edges, squares. clamps. a good sized flat assembly table will help you no end.
-
9th September 2010, 06:21 PM #4
Novice
- Join Date
- Sep 2010
- Location
- Warradale, Adelaide
- Posts
- 8
Thanks - looks like I'm going shopping. Originally Posted by artme

These are the bits I picks up to make my filter sump and trickle tower:
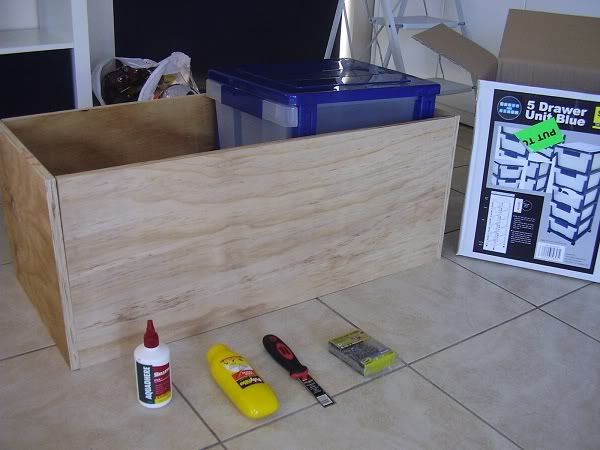
The box is just sitting free in the picture. I thought I could screw plywood together and keep it square. Boy was I wrong! I need some clamps I think.
-
9th September 2010, 08:24 PM #5
GOLD MEMBER
- Join Date
- Mar 2009
- Location
- Sydney
- Age
- 37
- Posts
- 0
G'day mate and welcome to the forum

Good luck with your projects
-
13th September 2010, 08:12 PM #6
GOLD MEMBER
- Join Date
- Jun 2003
- Location
- Paralowie SA
- Age
- 62
- Posts
- 0
welcome you releaze that if you make an aquiruim out of plywood you won't be able to see the fish through the sides of the plywood
this is the right place to ask questions
welcome to another south aussie
regards Michaelenjoy life we are only here a short time not a long time
-
13th September 2010, 08:20 PM #7
 Retiring type.
- Join Date
- May 2007
- Location
- Pretty Sally Hill, Wallan Vic
- Age
- 84
- Posts
- 0
Something is fishy about this
Welcome to the forum - hope you gain lots of
friends and heaps of good advice.
AllanLife is short ... smile while you still have teeth.
-
13th September 2010, 11:47 PM #8
Novice
- Join Date
- Sep 2010
- Location
- Warradale, Adelaide
- Posts
- 8
Damn - and I thought you could make anything with wood! Originally Posted by coffenup
 There must be some way to make plywood see-through???
  Nice to meet another Adelaidian.
I've glued and screwed most of my filter box together using a couple of Mitre & Corner clamps to keep it square. Seems to have worked. Hopefully it'll get fishy real soon...
-
15th September 2010, 10:29 AM #9
New Member
- Join Date
- Sep 2010
- Location
- California
- Posts
- 1
What's up
Welcome man
-
15th September 2010, 04:05 PM #10
Novice
- Join Date
- Sep 2010
- Location
- Warradale, Adelaide
- Posts
- 8
I've managed to make a box! YEAH! Here is how:
Sump filter design
I had a few reasons for wanting to make my own plywood sump:
- I wanted to make plywood aquariums but have never worked with wood before, so a simple sump seemed like an easy way to start
- I wanted to install a continuous water changing system and therefore needed to modify my existing sump. I figured that it would be just as easy to custom make a sump with the necessary modifications.
- I wanted a wet / dry low maintenance trickle filter and didn't have room in my old sump
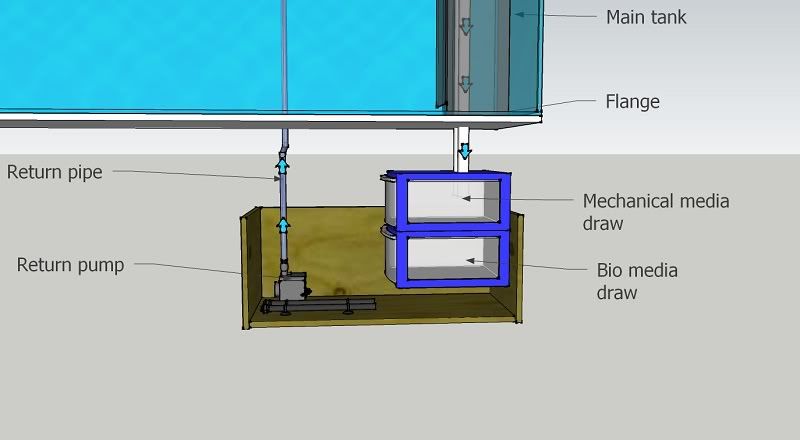
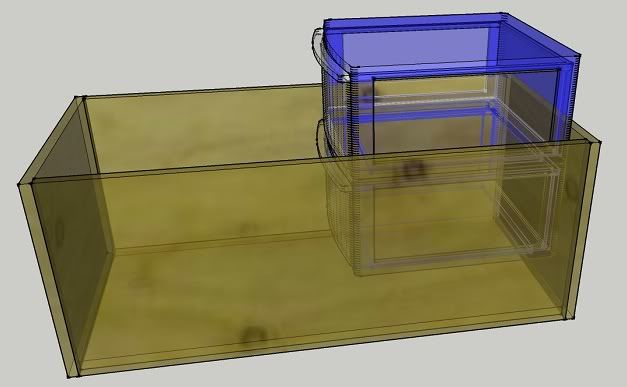
Intended sump layout in tank cabinet
From Bunnings:
SUPPLY LIST
- $31- 2400mm x 1200mm 17mm plywood panel from Bunnings, pre-cut to requirements
- $17 - 30mm x 30mm x 2.4m treated pine bar, pre-cut to requirements
- $11 - Polyfilla Large Cracks
- $11 - Glue - Selleys adhesive aquahere exterior
- $11 - Screws
- $5 - Norton cloth tape
- $27 - Thompson's water seal paint
- $8 -Paint brushes
- $18 - 32mm bulkhead
- $7 - reduction fittings for bulkhead
From the reject shop:
- $35 - 5 draw unit
Tools:
- $17 - Hole saw set
- $16 - 2 x Mitre & Corner clamps
- $15 - 2 x G clamps
- $6 - Paint scraper
The plywood was cut into the following lengths: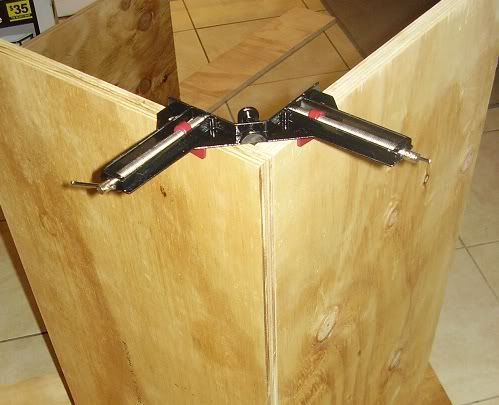
I used a miter & corner clamp to ensure the butt joints were square
- Base : 900mm long x 400mm wide
- Sides: 900mm long x 366mm high
- Ends: 434mm wide x 366mm high
I started by joining the long sides to the base. This is how I did it:
- The miter & corner clamps held the plywood exactly where I needed it.
- I then drilled a hole at each end through the base into the side.
- Then I put screws into the holes
- I took the lamps off, took the screws out and ran glue along the end of the ply.
- Then I screwed it back together and wiped away excess glue with a damp cloth.
- I did exactly the same for the other side.
I attached the ends using much the same process, using 4 screws and gluing the end. I wiped away the glue with a damp cloth.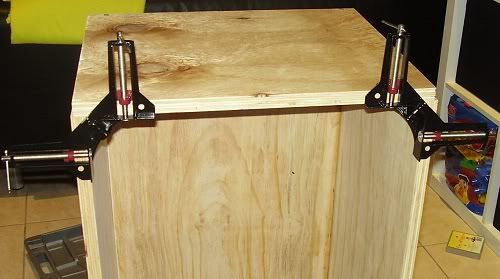
I used the miter & corner clamps to get the ends square as well

End with first screws put in
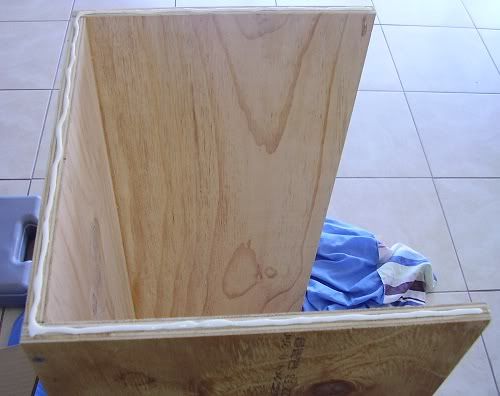 End removed for gluing
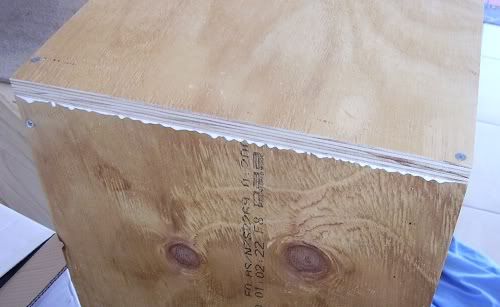 End put back and screwed down
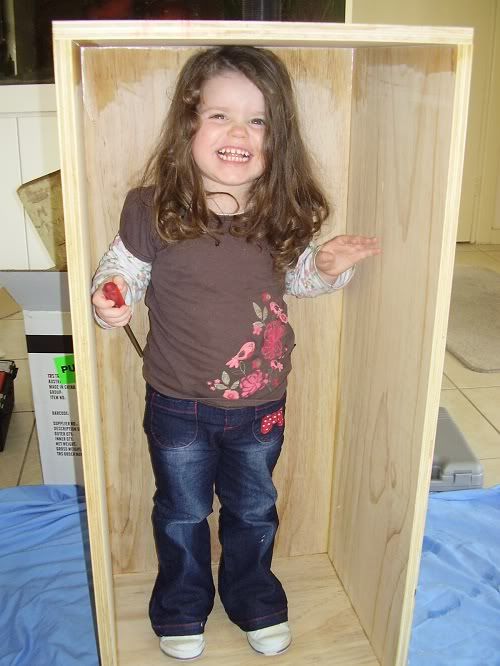
"Look Daddy! It's a house!"
I drilled a large hole for my bulkhead. This took a LONG time using my wife's battery powered drill!
Holes drilled for the rest of the screws and the bulkhead for sump drain fitted

I added screws every 60mm
I then drilled and added screws along every join in the tank, with the screws spaced about 60mm apart.
-
15th September 2010, 04:37 PM #11
SENIOR MEMBER
- Join Date
- Feb 2007
- Location
- humpty doo N.T
- Age
- 48
- Posts
- 0
Welcome to the nut house you will find some very useful info from this mob.
OK you have me intrigued why ply why not glass?
I used to have a large number of fish tanks all with sumps always used glass.
What type of fish tank are you running?Cheers Rum Pig
It is easier to ask for forgiveness than permission.
-
15th September 2010, 04:56 PM #12
SENIOR MEMBER
- Join Date
- Feb 2007
- Location
- humpty doo N.T
- Age
- 48
- Posts
- 0
OK I have been looking at your box and a few things pop to my mind.
I would make the base the size of your overall box so all sides sit on your base this would give you a flat surface and the long side I would run the full length and the end fit inside them.
When you pre drill have drilled the piece that the screw is entering bigger than the screw thread, this eliminates the screw having to cut a thread before it is needed.
I will keep thinking.Cheers Rum Pig
It is easier to ask for forgiveness than permission.
-
15th September 2010, 05:54 PM #13
Novice
- Join Date
- Sep 2010
- Location
- Warradale, Adelaide
- Posts
- 8
Yes - I realized my mistake after assembly. The base is not flush with the ground, it is slightly warped. The next time I will have the base the biggest part. Originally Posted by Rum Pig
Why would you have the sides longer than the ends?
The main reason for using ply is practice! I'm planning to make a massive 7,000 liter+ aquarium and you just can't do it with glass. Plywood in a frame is the go. I'm getting some practice and learning prior to making the monster. Also large ply tanks are much cheaper than glass or acrylic tanks and last just as long (15 years).
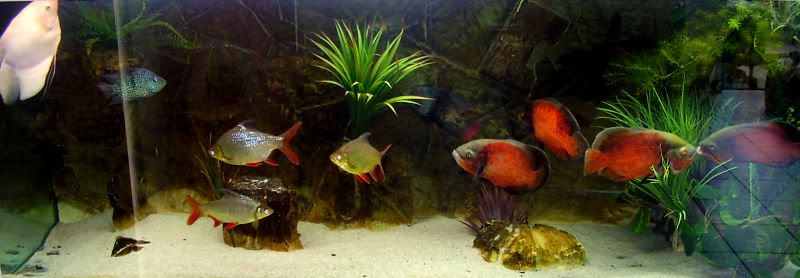
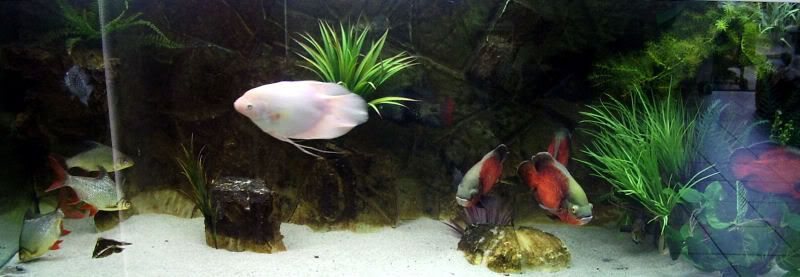
My tank in a 1000 liter amazon theme aquarium.


Last edited by Griller76; 15th September 2010 at 06:08 PM. Reason: Adding extra comment
-
16th September 2010, 09:12 AM #14
SENIOR MEMBER
- Join Date
- Feb 2007
- Location
- humpty doo N.T
- Age
- 48
- Posts
- 0
WOW you have some nice fish their and a nice tank Originally Posted by Griller76
I would have the side longer because they will ha the most pressure from the water so screwing into the ends should give you better strength. the other reason and much less important is it will look better as you will not see the side of the ply just a full sheet.
7,000ltr wow that is big is it going to for viewing like a normal fish tank or is it for breeding?
The reason I ask is if it is for viewing you will need to work out how to add the glass viewing panels.
I assume you do realise that will weigh over 7 tonnes so you will need a decent stand.
To say you cannot build it from glass is wrong but you are correct in saying it would be cheaper.
The biggest I built was 2000 ltr out of glass but I must admit I did not have to pay for glass back then. It was so big if we wanted to remove a fish we literally went fishing in the tank and do not even ask about the day we had to move it
Is your monster going to be square in shape or is it going to run around the walls in a room because if it is square or rectangle you will be looking at about 4 tonne of pressure on the sides that is a lot.Cheers Rum Pig
It is easier to ask for forgiveness than permission.
-
16th September 2010, 11:44 AM #15
Novice
- Join Date
- Sep 2010
- Location
- Warradale, Adelaide
- Posts
- 8
Thanks mate - I am a bit obsessed with my fish
You have built aquariums! 2,000 is MASSIVE for a glass aquarium!
My 7,000 will be a display tank and maybe a breeding tank for Giant Gouramis.The glass will be added to a wood window frame and held in place by a seat of silicone.
I've never seen a glass tank over 1500 liters or an acrylic one over 3,000 except in public aquaria where the tanks are worth $100,000 and up. Oh - I did see a private aquarium in port lincoln that was huge but I know the acrylic alone cost $1,000,000 and had to be imported from Japan. My budget of $10,000 prohibits that kind of tank.
I don't know much about woodwork but I do know a lot about water and fish keeping. I used to manage a large aquaculture farm near Port Lincoln and I was president of the South Australian Native Fish Association. Water pressure on the sides is subject only to depth, not volume. A 900mm deep tank of 500 liters has the same pressure on the sides as a 900mm deep of 5,000 liters. I know that sounds strange but that is how fluid dynamics work. Depth is the killer when it comes to pressure. If I wanted to be cheap I could build a 600mm deep tank with an enormous area, but in truth I want something more spectacular. I'd like a tank between 900mm and 1800mm deep.
Here is a very rough idea of what I'd like to make:
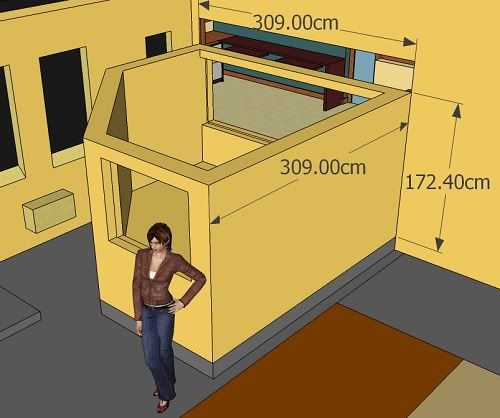
View from outside

View from inside house
I'd like it to be a tank that I can get into and swim around. At this size I'll probably have no choice but to get into it for maintenance and cleaning.


 Reply With Quote


Similar Threads
-
Hi from Adelaide
By David_SA in forum G'day mate - THE WELCOME WAGON -Introduce yourselfReplies: 5Last Post: 7th September 2009, 02:06 PM -
Hello from Adelaide
By suzer in forum G'day mate - THE WELCOME WAGON -Introduce yourselfReplies: 5Last Post: 6th September 2009, 01:25 PM -
G day from Adelaide
By toadfish in forum G'day mate - THE WELCOME WAGON -Introduce yourselfReplies: 7Last Post: 13th April 2009, 10:45 AM -
Hello from Adelaide
By Mickyb in forum G'day mate - THE WELCOME WAGON -Introduce yourselfReplies: 8Last Post: 10th October 2008, 12:15 AM
