

 Thanks: 0
 Likes: 33
 Needs Pictures: 0
 Picture(s) thanks: 1
Results 91 to 105 of 145
Thread: Show Off Your Chisels
-
16th August 2010, 09:10 PM #91
 gravity is my co-pilot


- Join Date
- Apr 2010
- Location
- Melbourne
- Posts
- 238
 Here's a link to the company I mentioned (no affilliation, I just bought some stuff a while back): Not so badly priced with the chicken-chested pound!
 Originally Posted by RayG

Tool Accessories & Parts
regards,
B-D.
-
18th August 2010, 03:41 AM #92
Be inspired. Be creative. Be bold.
- Join Date
- Apr 2001
- Location
- Perth
- Posts
- 9,037
OK, I would like some comments on the most low tech method I know of heat treating a blade. Let's call this a learning experience and I will takes the lumps and criticism.
Here is the situation ...
As mentioned earlier, I made a chisel for a woodworking friend. The basis of the chisel was the blade out of a black, plastic handled Stanley I have had for 10 or more years. The steel was reasonable, but on the too soft side to hold an edge for long, and the black handle was just plain Horrible.
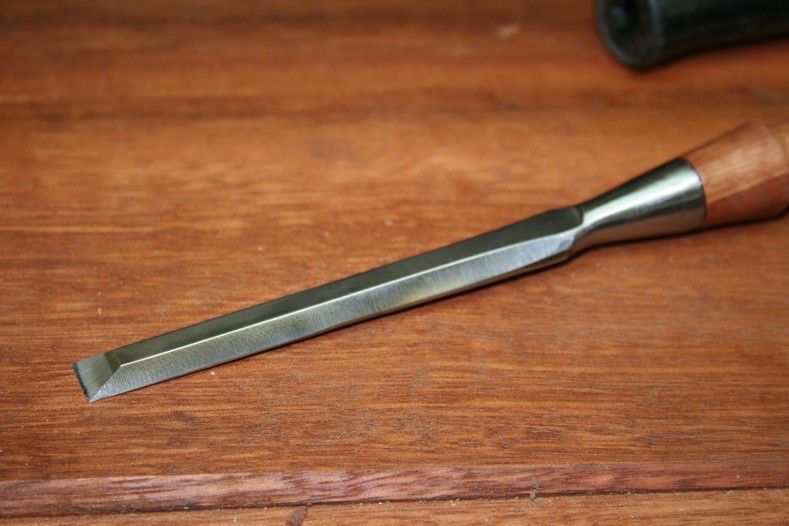
I wanted to turn this into a nice looking chisel that could be used for paring dovetails. First thing I did was to wack off the handle (easily done with a hammer), and then ground the shoulder of the blade until they were narrow (there is a pictorial on my website). This was the result. You can see the interesting tang ...
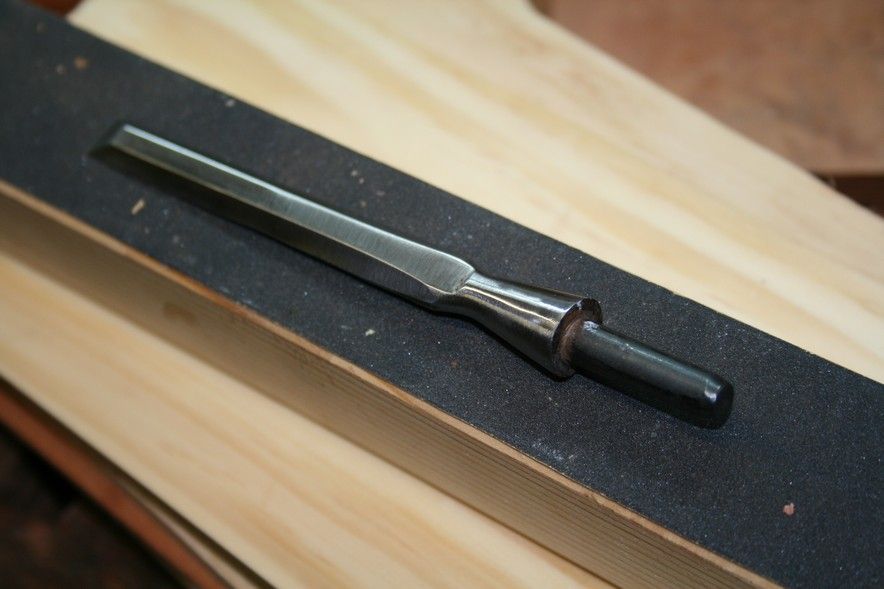
Incidentally, the Marples/Irwin blue handle chisels look the same.
The heat treating was done with two butane torches ...
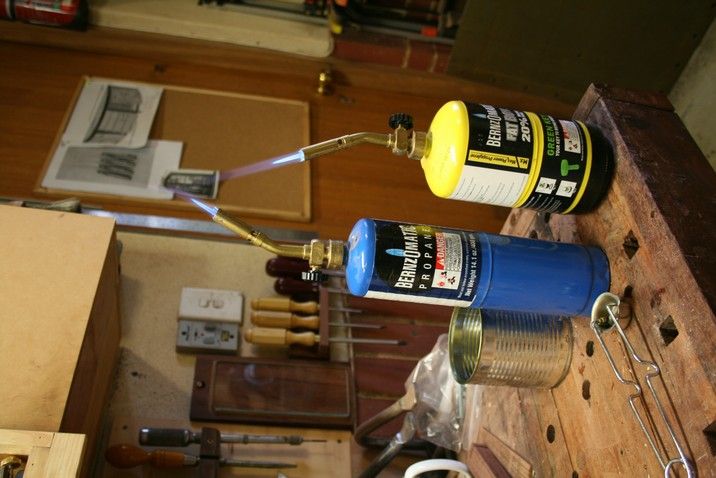
Alongside is a tin of peanut oil for part-quenching. Why "part-quenching"? Because I have no idea what the steel is. I suspect it is a O1 type rather than a W1 type. So I plan to quench in oil (which can be too slow for W1) and then re-quench in water. I have done this before successfully - any comments?
I do not heat the steel to cherry with the lights on. It is difficult to judge colour in the light, so the lights go off and I am left with a gloom.
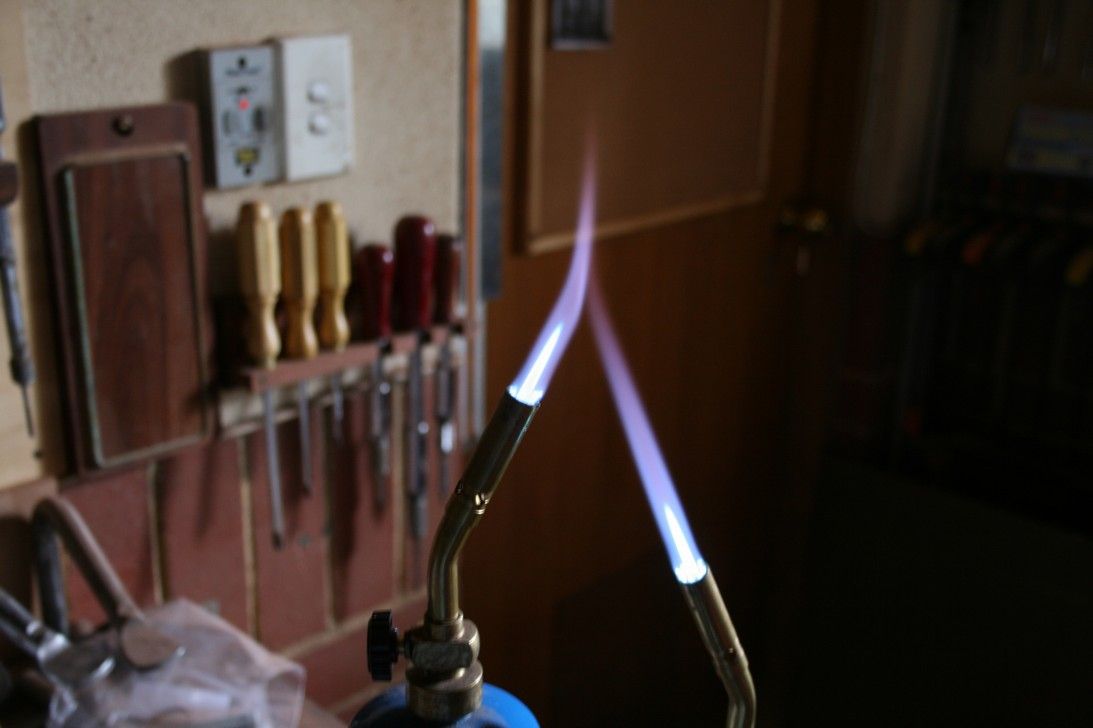
I did not think to take a picture of the cherry (partly because it was difficult, but mainly because I only thought of pictures after this stage!). So just imagine cherry red for the first 2" of the blade. Then dunked in peanut oil until still warm, and then under cool water.
A file slides off the steel (i.e. the steel is harder than the file), so I consider it ready for the next stage.
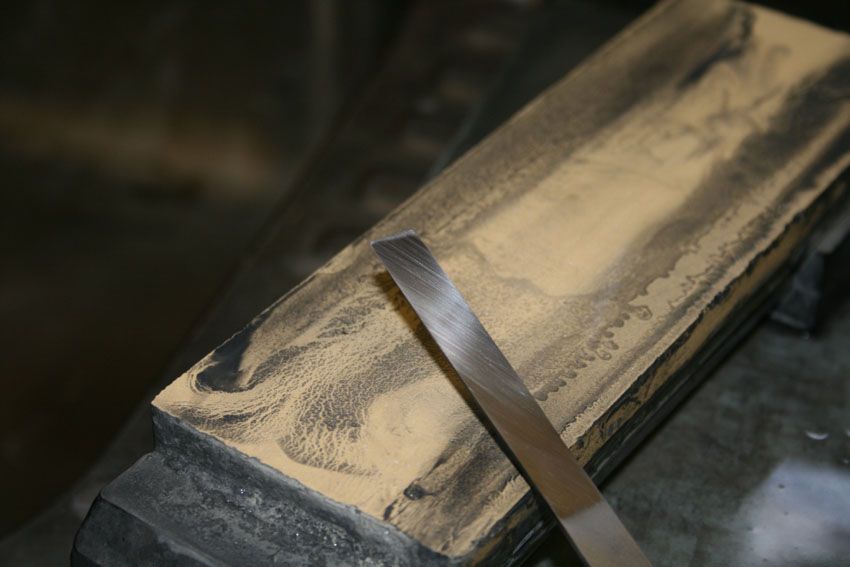
First I clean off the blackened steel with fine sandpaper, getting back to a bright surface (all the better to see the colours in the next stage). So it is time for tempering.
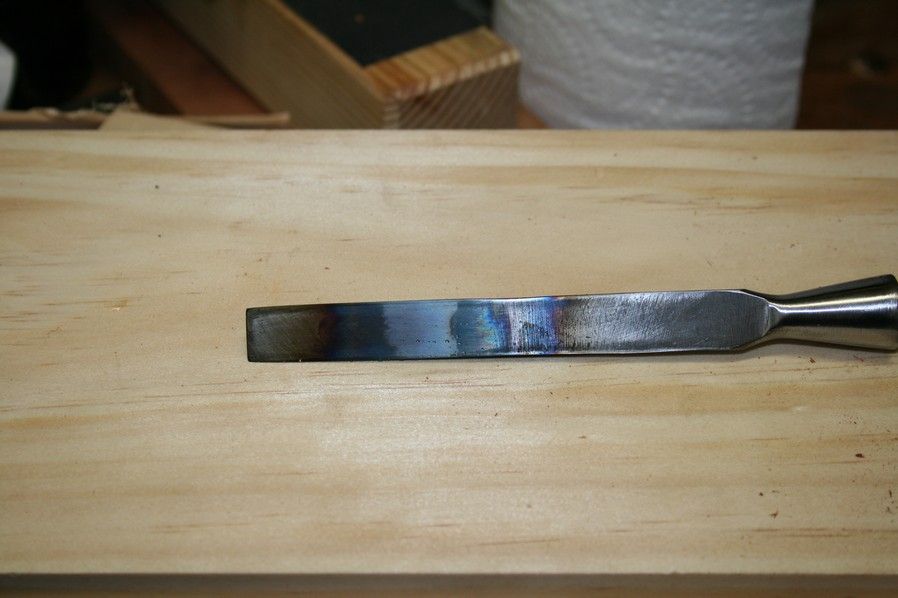
Back to the torch - this is what I meant by low tech. I start about 2" back, get the steel hot and watch the colour changing as it moves along the blade towards the bevel end. As it get the palest of yellow I immediately quench it in the oil and again the water.
Here is a picture. The flash has made the yellow a little whiter than it actually was, but the steel was a faint yellow ("straw") at the tip.
The blade is now cleaned, lapped on 400 grit diamond stone, 1000/5000/12000 Shaptons - however I must point out that only the last 1" behind the bevel was lapped to 12000.
The final chisel looks like so ..
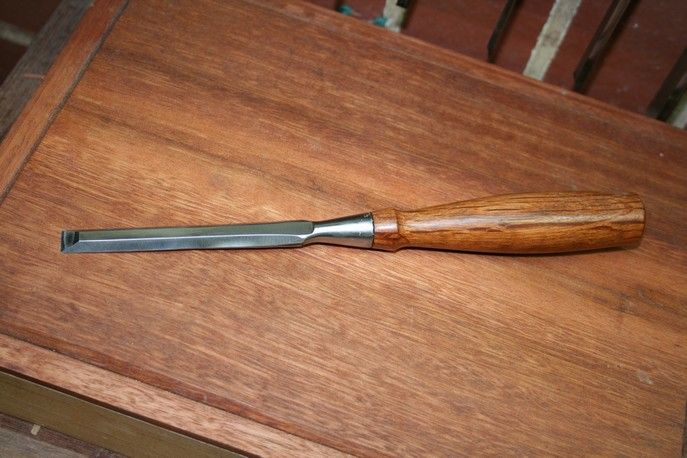
The eagle-eyed among you will notice that the handle has changed. Well I found a hairline crack in the wood of the other and so made a new one (of She-oak).
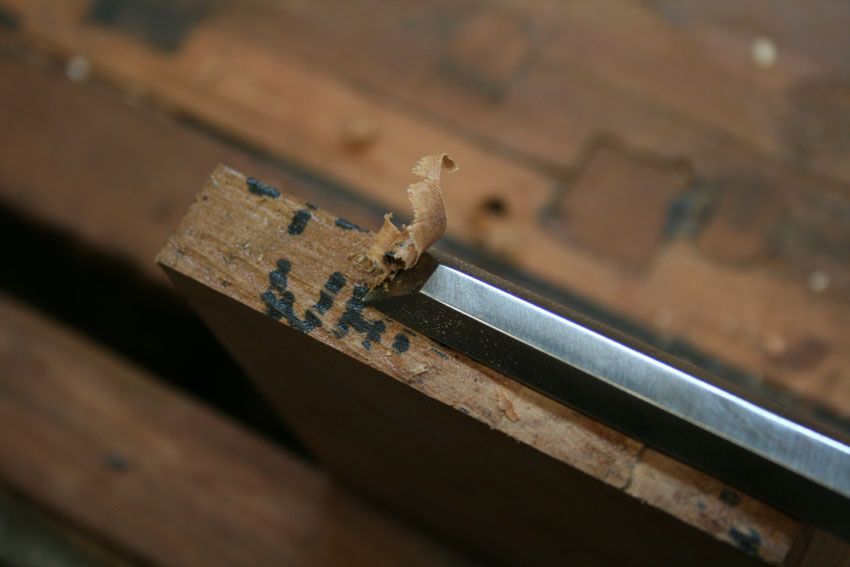
The proof of the pudding lies in the eating. Paring endgrain Radiata Pine (Truly Horrible Stuff) ...
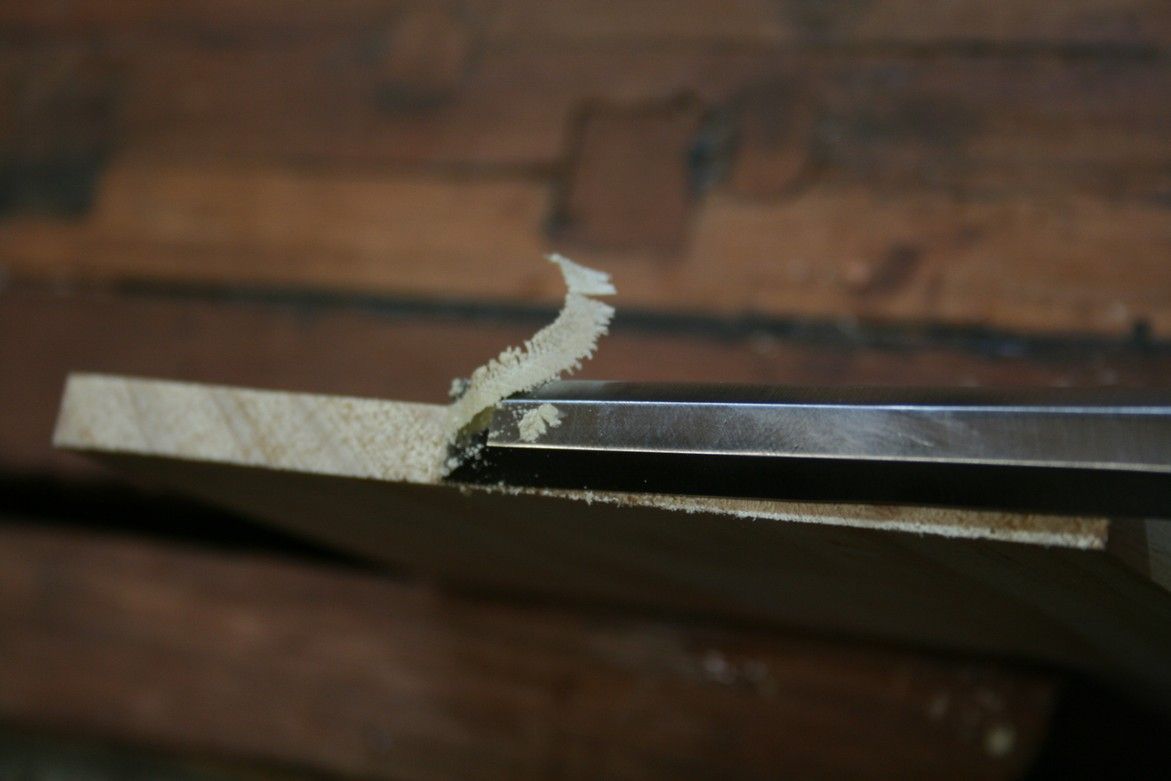
It held up well in very hard wood as well. This is Wandoo endgrain - one of the hardest woods in the world. I kid you not.
Comments?
Regards from Perth
DerekVisit www.inthewoodshop.com for tutorials on constructing handtools, handtool reviews, and my trials and tribulations with furniture builds.
-
18th August 2010, 11:01 AM #93
SENIOR MEMBER
- Join Date
- Jan 2008
- Location
- NSW southern Highlands
- Posts
- 465
Derek
I was taught this process many years ago using a blacksmiths coke fired furnace ( I guess that would be Sub Low Tech ) . These methods certainly work, but they can be a bit unpredictable as you do not have the fine control on temperatures as a modern manufacturing facility has. As you rightly point out the background lighting affects the colour & one persons assessment of Cherry red or Straw will differ from another. Tempering especially can be difficult as the colour can change very rapidly, which can be assisted by laying the piece on a heated fire brick to slow the heat transfer.
Congratulations on your results the chisel not only looks nice but would seem to be performing well.
Regards
-
18th August 2010, 12:00 PM #94
GOLD MEMBER
- Join Date
- Mar 2004
- Location
- Brisbane (western suburbs)
- Age
- 78
- Posts
- 10,475
My colour-vision is too poor to judge the 'straw' colour, so I have used (once!) the oven method. An hour at flat-out in our standard domestic oven seemed to do the trick. Tempering is a time + temperature affair - i.e. a longer time at a lower temperature achieves the same end. You don't actually need to quench for tempering in an oven, cooling fast or slow is ok, but quenching allows you to play with your new edge sooner, of course.
We all seem to be spending more time making tools than making things with them, lately - what's going on??
Cheers,IW
-
18th August 2010, 12:20 PM #95
Hewer of wood
- Join Date
- Jan 2002
- Location
- Melbourne, Aus.
- Age
- 71
- Posts
- 0
Winter?
There's real satisfaction I reckon in making tools and jigs. And it gives you new respect for the professionals.Cheers, Ern
-
22nd August 2010, 12:43 AM #96
Mildly Moderate
- Join Date
- Nov 2007
- Location
- Albury Well Just Outside
- Posts
- 7,532
Work has taken up most of my time. Originally Posted by IanW

-
5th September 2010, 08:48 PM #97
Heavy Machinery
- Join Date
- Mar 2008
- Location
- Lambton, Newcastle, NSW, Australia
- Posts
- 2,037
Got a heap of sawdust in my chisel drawer today so while they were out I took a quick family snap shot of them. Clockwise from the top left are some of my Great Great Grandfathers carving chisels ( I have another heap of them in his 170 year old chest) then a few odd gouges etc, a couple of slicks (one western, one Japanese) home made squew, some Pfeil carving chisels, LN dovetail, a set of Stubis, a few motice chisels (some more of GGGrandfathers) a Jap, a Titan (needs attention) a Toledo, E A Berg, and a set of Titans which are my main users. There's another bunch in my site trailer and the old tool chest, I'll leave them for another day.
-
6th September 2010, 12:07 AM #98
Good Wood Ruined!
- Join Date
- Jan 2004
- Location
- Towradgi
- Posts
- 1,658
CH, use the Stubai's , they love the use!
Pat
Work is a necessary evil to be avoided. Mark Twain
-
6th September 2010, 12:15 AM #99
Heavy Machinery
- Join Date
- Mar 2008
- Location
- Lambton, Newcastle, NSW, Australia
- Posts
- 2,037
Hi Pat, I like them for the finer, lighter jobs but a lot of my work is heavier so I reach for the Titans. I can be a little more forcefull with them. The Stubais are a lovely fine chisel and I enjoy using them on Cedar, Kauri etc.
-
8th November 2012, 01:19 AM #100
New Member
- Join Date
- Oct 2012
- Location
- South Africa
- Posts
- 1
An inspirational thread
-
13th November 2012, 07:17 PM #101
Intermediate Member
- Join Date
- Mar 2011
- Location
- Bangkok Thailand
- Posts
- 42
-
13th November 2012, 09:32 PM #102
GOLD MEMBER
- Join Date
- Aug 2009
- Location
- Armadale Perth WA
- Age
- 55
- Posts
- 4,329
Very nice - what brand is in the second-from-bottom row? Originally Posted by neilyeag
Paul
-
14th November 2012, 09:48 AM #103
Senior Member
- Join Date
- Dec 2011
- Location
- geelong
- Posts
- 124
My Contribution
I have been lurking for some time and thought it was about time to stump up with some snaps,so here are most of my chisels.
-
14th November 2012, 09:53 AM #104
Timber Hoarder
- Join Date
- Sep 2002
- Location
- Minbun, FNQ, Australia
- Age
- 66
- Posts
- 4,229
Impressive but....
 some of them aren't chisels.
  Cliff.
If you find a post of mine that is missing a pic that you'd like to see, let me know & I'll see if I can find a copy.
-
14th November 2012, 10:24 AM #105
GOLD MEMBER
- Join Date
- Sep 2010
- Location
- Sydney
- Posts
- 1,618
When you have a hammer everything looks like ... a chisel Originally Posted by Cliff Rogers

 Reply With Quote


