

 Thanks: 3
 Likes: 35
 Needs Pictures: 0
 Picture(s) thanks: 1
Results 31 to 45 of 62
-
3rd October 2014, 02:47 PM #31
 Deceased


- Join Date
- May 2008
- Location
- Australia
- Posts
- 2,306

Completing the mortise clean out on the 4th boxed chamfer body.

The previous 3 plane bodies after the mortise has been totally cleaned out and sealed with a coat of shellac.


Stewie;
-
3rd October 2014, 03:43 PM #32
Deceased
- Join Date
- May 2008
- Location
- Australia
- Posts
- 2,306
To accurately describe how much fun it is to mortise these plane bodies out; "imagine watching a 3 legged tortoise compete in a 20k marathon, from the very start to when it crosses the finish line."

Stewie;
-
3rd October 2014, 04:01 PM #33
GOLD MEMBER

- Join Date
- Nov 2011
- Location
- Melbourne
- Posts
- 6,204
Would the tortoise have runners on
-
3rd October 2014, 04:24 PM #34
GOLD MEMBER
- Join Date
- Nov 2004
- Location
- Millmerran,QLD
- Age
- 73
- Posts
- 10,469
Stewie Originally Posted by planemaker

I think I know that feeling as I am going through a slightly less arduous process with totes for handsaws . I am looking forward to the finished product; Yours that is
  .
.
Regards
PaulBushmiller;
"Power tends to corrupt. Absolute power corrupts, absolutely!"
-
3rd October 2014, 11:13 PM #35
Deceased
- Join Date
- May 2008
- Location
- Australia
- Posts
- 2,306
No pain no gain Paul.

-
11th October 2014, 06:50 PM #36
Deceased
- Join Date
- May 2008
- Location
- Australia
- Posts
- 2,306
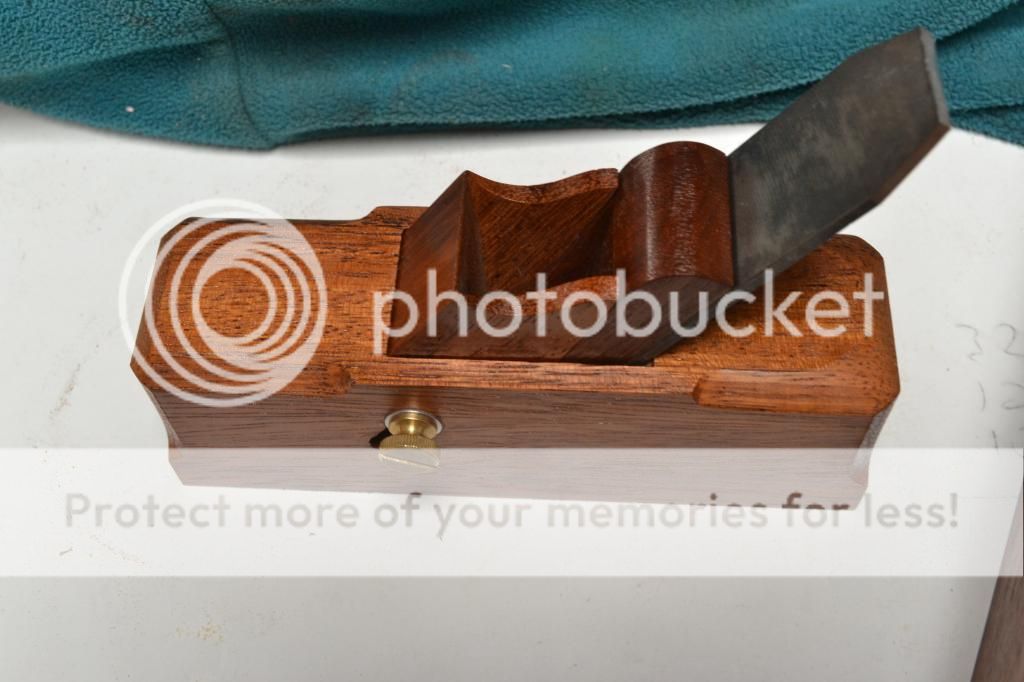
The mortise fit for the sliding depth stop, as well as the V shaped sole have been completed on all 4 chamfer planes.
Stewie;


-
11th October 2014, 10:34 PM #37
GOLD MEMBER
- Join Date
- Apr 2012
- Location
- Sydney
- Posts
- 1,488
These seem to have a mush larger V section than the first plane.
What was the rationale behind that?
The surface of the V looks great. How did you finish it and keep it square?
-
12th October 2014, 01:52 AM #38
Deceased
- Join Date
- May 2008
- Location
- Australia
- Posts
- 2,306
Originally Posted by hiroller
Hi Hiroller.
The V sole is an important design feature of the plane. The sole needs to remain in full contact with the flat surfaces of the 90* edge . By increasing the width of the sole I am also creating a greater contact surface area. That allows the plane to track more easily in parallel alignment to the boards corner edge.
Stewie;
-
20th October 2014, 05:47 PM #39
Deceased
- Join Date
- May 2008
- Location
- Australia
- Posts
- 2,306
Further progress ongoing.
Stewie;


-
7th November 2014, 04:56 PM #40
Deceased
- Join Date
- May 2008
- Location
- Australia
- Posts
- 2,306
Hi all. As you will note from the attached photo's I am still making reasonable progress on the batch of box chamfer plane builds.


Still to complete. (in sequential order).
Cut the tines out on the wooden wedges;
Fit the outer brass keeper plates to the height adjuster;
Fit the brass sole plates on the bottom of the box;
Final shaping to the top of the plane bodies as well as complete the chamfering;
Fit strike buttons on the back end of the plane bodies;
Sharpen the irons up;
Test each plane and fine tune if required;
Apply 2 more coats of garnet shellac finish;
and the lastly- stamp the front end of the plane bodies with a makers mark;
Stewie;
-
10th November 2014, 09:23 AM #41
SENIOR MEMBER
- Join Date
- Jul 2003
- Location
- Melbourne
- Age
- 53
- Posts
- 536
Fantastic work, I am assuming you sell some of the planes you make?
Do you ever make hollows/Rounds? I have always wanted a half set but have nver managed to find any at a descent price...
joez
-
10th November 2014, 10:29 AM #42
.
- Join Date
- Dec 2013
- Location
- San Antonio, Texas, USA
- Posts
- 3,004
Great work Stewie. What motivated you to make these? Did you need to for some project or you just felt like doing it?
Cheers,
Rob
-
10th November 2014, 11:15 AM #43
Deceased
- Join Date
- May 2008
- Location
- Australia
- Posts
- 2,306
Thanks for the feedback joez. Yes I do sell my work. As far as Moulding Planes. No I haven't made any. Originally Posted by joez
Stewie;.
-
10th November 2014, 11:52 AM #44
Deceased
- Join Date
- May 2008
- Location
- Australia
- Posts
- 2,306
Hi Rob. My foray into traditionally constructed hand planes occurred about 5 years before I started working on Back-saws. Originally Posted by rob streeper
The personal challenge was the primary motivation that caught my interest.
Stewie;
-
13th November 2014, 03:47 PM #45
Deceased
- Join Date
- May 2008
- Location
- Australia
- Posts
- 2,306
The wooden wedges are now complete. I decided to skip installing the brass inlays for now and focus on shaping the top of the plane bodies.
Here is a disassembled view, with a start made on reshaping the top.

Here you can see a completed top. Quite a nice transformation.

Stewie;


 Reply With Quote


