

 Thanks: 0
 Likes: 0
 Needs Pictures: 0
 Picture(s) thanks: 0
Results 31 to 45 of 80
Thread: A huge drum sander
-
15th June 2007, 06:36 AM #31
 Intermediate Member


- Join Date
- Mar 2007
- Location
- Moinesti, ROMANIA
- Age
- 56
- Posts
- 33
 Yes, Andy Mac, and thank you again, only few vibrations at the middle of the table are still present.
 Originally Posted by Andy Mac

Cheers!Lucian
-
17th June 2007, 07:00 AM #32
Intermediate Member
- Join Date
- Mar 2007
- Location
- Moinesti, ROMANIA
- Age
- 56
- Posts
- 33
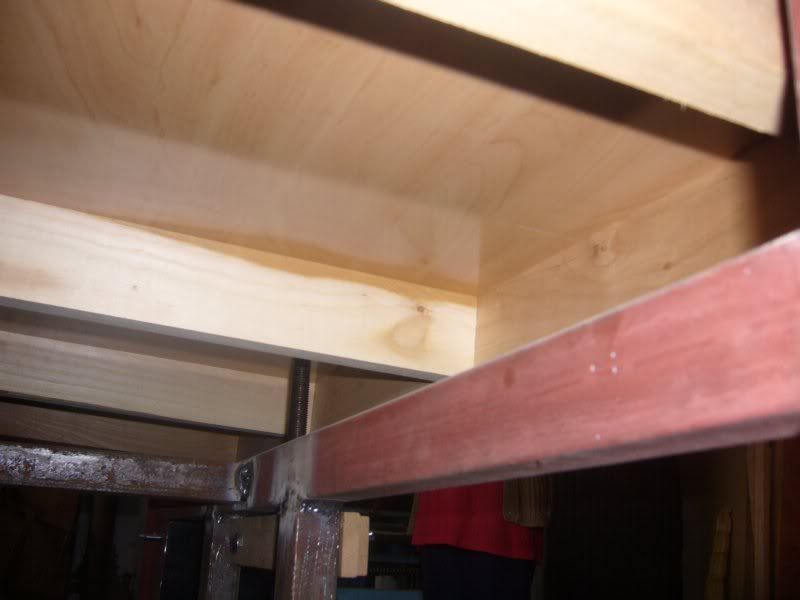
Hot pictures
G'day all !

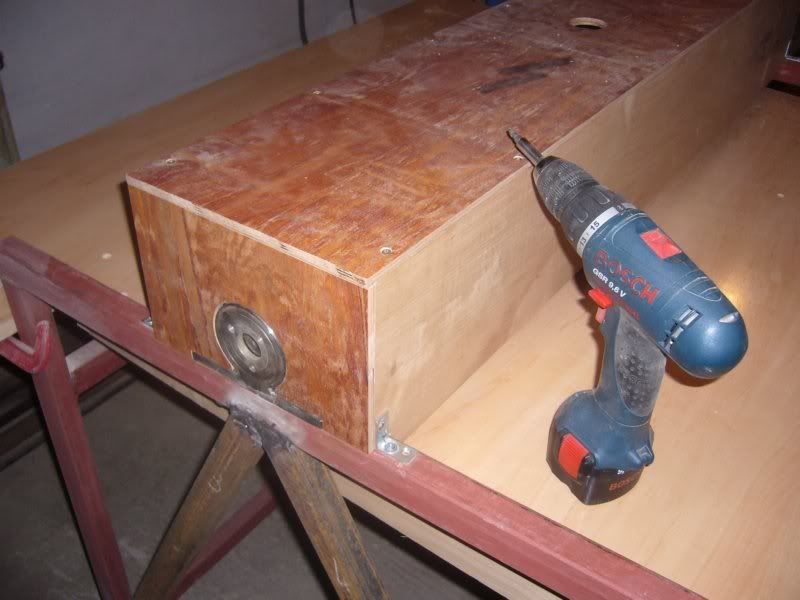
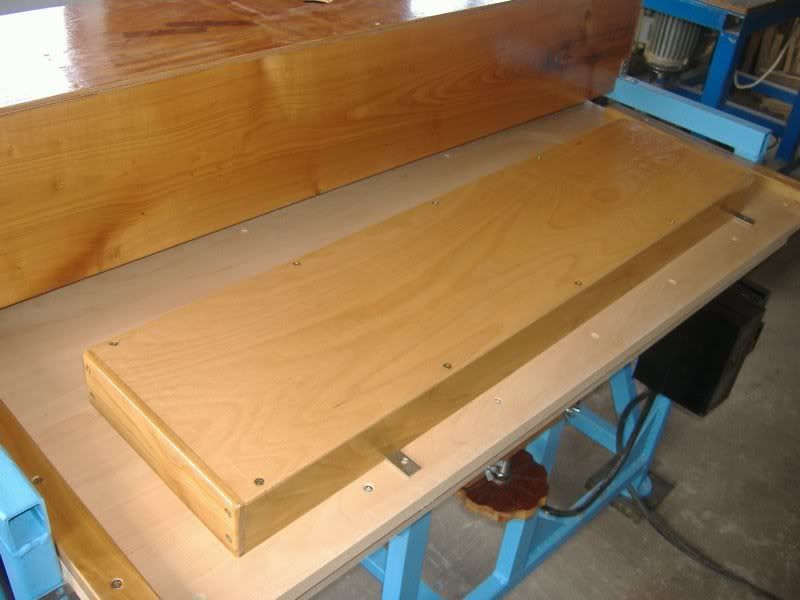
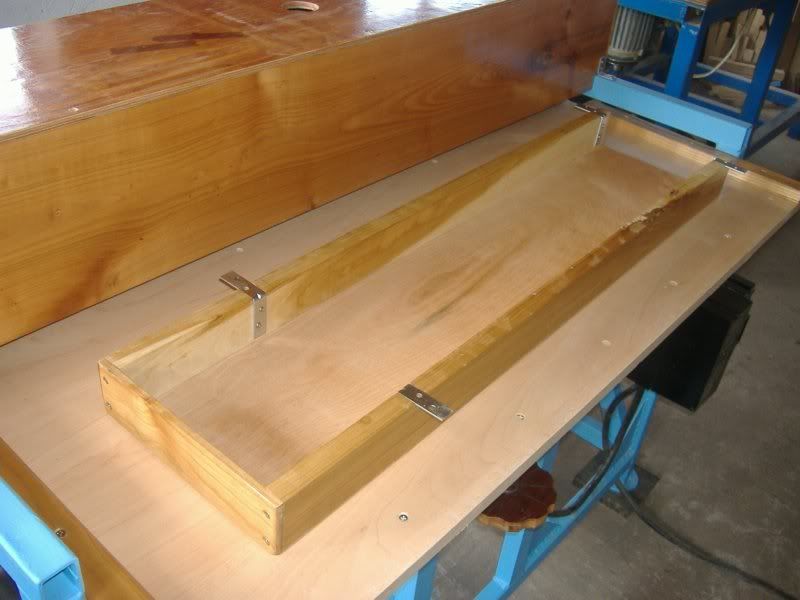
Now the table is reinforced & blocked with a pair of F clamps (to ensure the parallelism with drum)
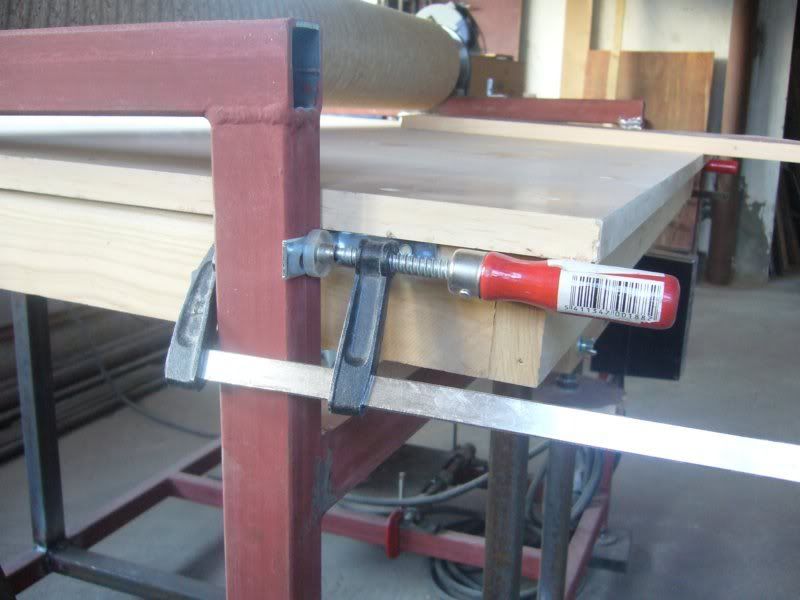
And under the table you can see reinforcements:


Absolutely, next step is drum final calibration
 Lucian
-
17th June 2007, 07:25 AM #33
Intermediate Member
- Join Date
- Mar 2007
- Location
- Moinesti, ROMANIA
- Age
- 56
- Posts
- 33
Finally, on of the two dust hood lateral covers (the left) is now ready
Drum without dust hood, befor covering with lacquer
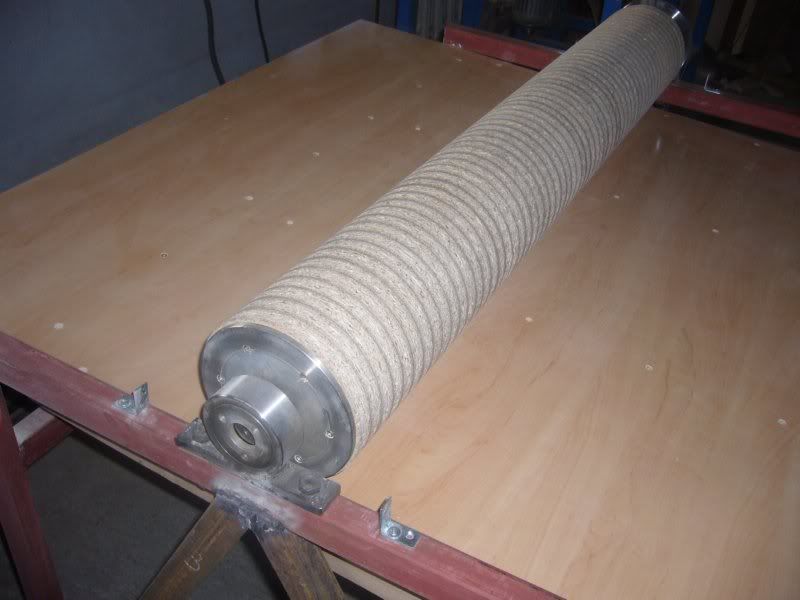
And after
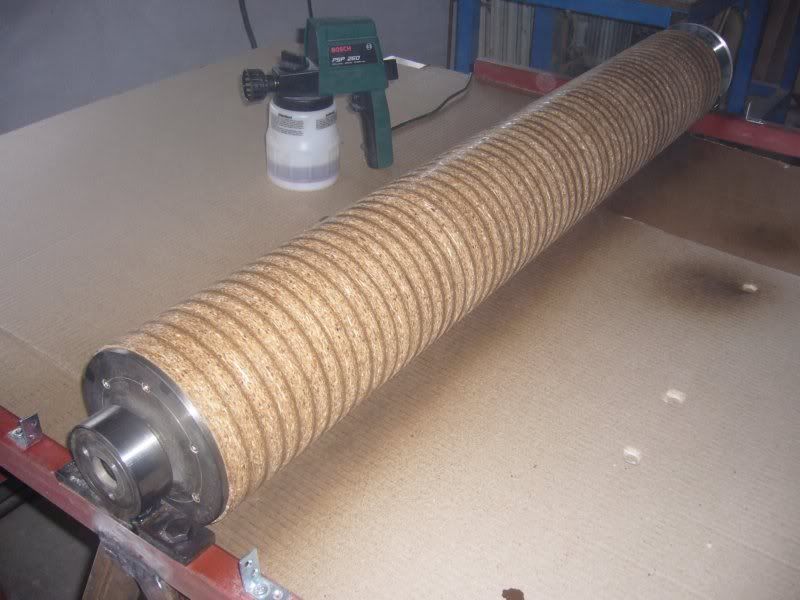
Dust hood and height adjusting mechanism lacquered
 Lucian
-
22nd June 2007, 03:58 PM #34
Novice
- Join Date
- Jun 2005
- Location
- alberta, canada
- Posts
- 16
Shaft idea
Hello all,
Being employed in a jd dealership as parts manager you always see parts that you think.... well I could use that to make my next machine....
The thought I had for a drum for the sander is a ruberrized or non ruberized baler roller! VERY strong and also machined true!
you could easily drive it from a pulley as there is already a place for a sprocket on the end!
the only thing is would be that you would have one giant roller about 6 feet long, but on the flipside it wouldnt take long to sand a dining room table top!!!!
Or you could also use a windrower (swather) canvas roller that is a lot smaller in length but still steel so very little flex.
Anyone wanting pics of these above mentioned items to get a better idea of what they look like or what they are let me know!
thanks all
Nathan
-
18th July 2007, 06:56 AM #35
Intermediate Member
- Join Date
- Mar 2007
- Location
- Moinesti, ROMANIA
- Age
- 56
- Posts
- 33
I'm back again
Hi people !

I'm back from my vacation and today was the grand finalLucian
-
18th July 2007, 07:01 AM #36
Intermediate Member
- Join Date
- Mar 2007
- Location
- Moinesti, ROMANIA
- Age
- 56
- Posts
- 33
It was an exciting finish of my drum sander !
Pics will be here tomorow
CheersLucian
-
19th July 2007, 06:29 AM #37
Intermediate Member
- Join Date
- Mar 2007
- Location
- Moinesti, ROMANIA
- Age
- 56
- Posts
- 33
Pictures
Hello!
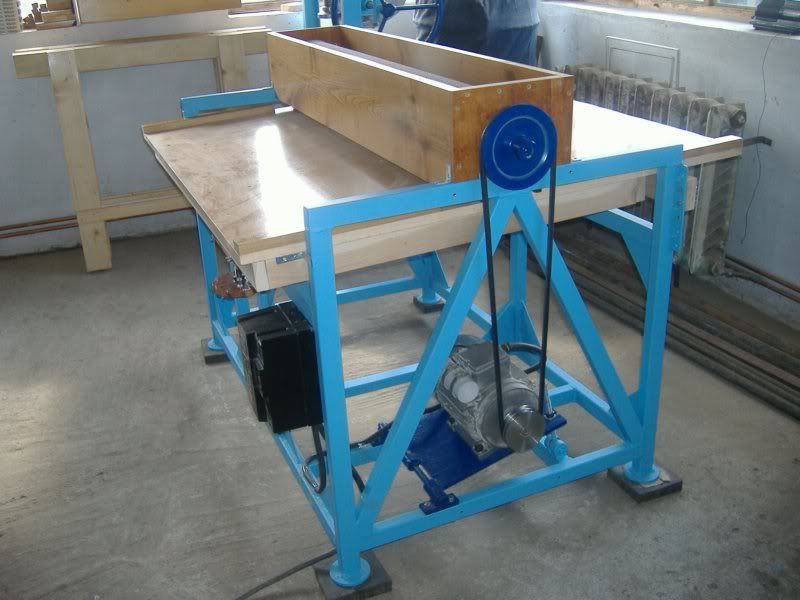
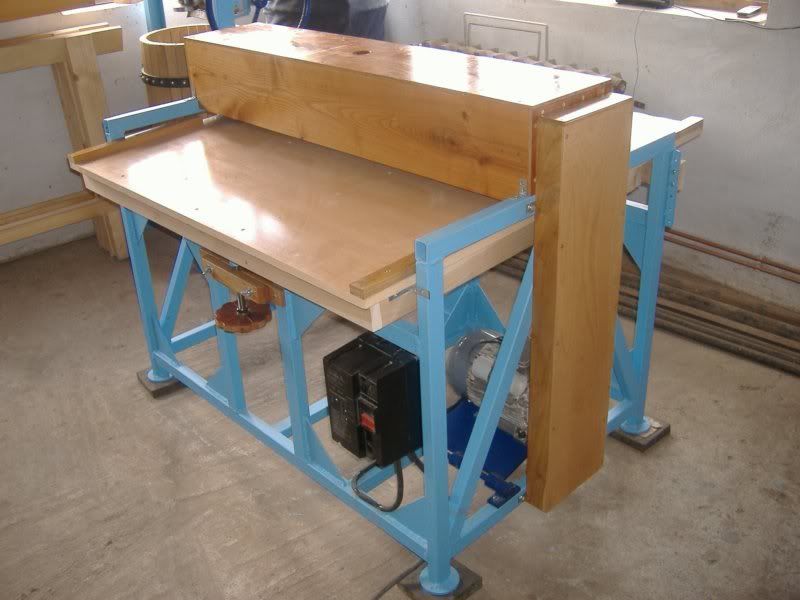
Pictures with drum sander at finish:
1. View from the front left

2. View from the left-front
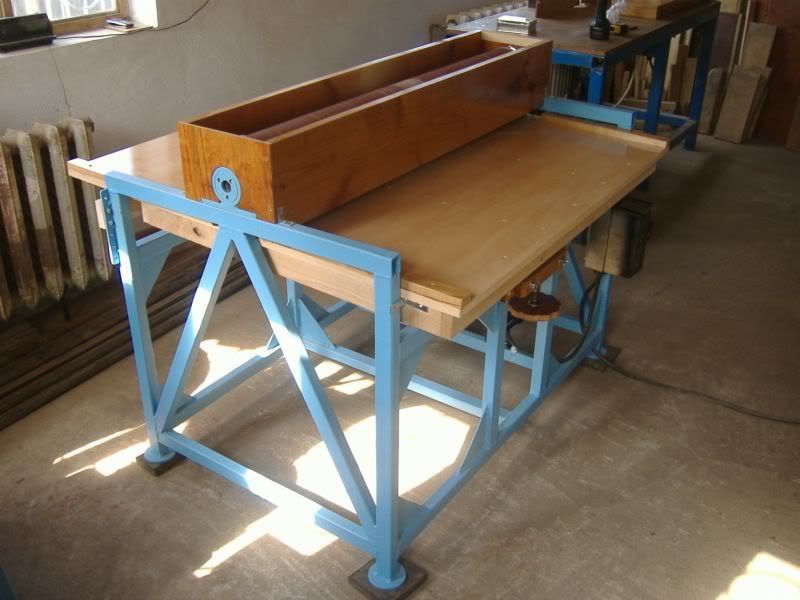
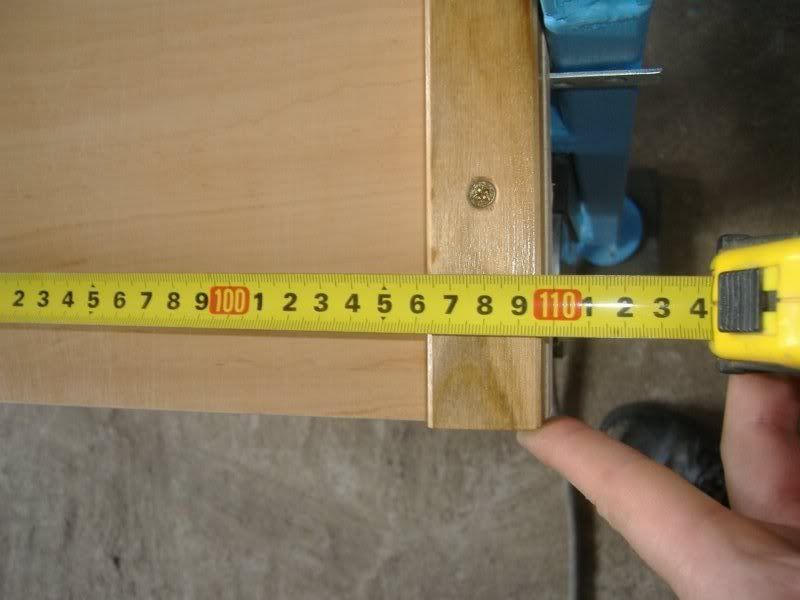
3. Adjusting thickness device - detail of fitting, view from right-back, side with hinges. The range of thickness is from 0 to 110 mm (enough for me!)
 Lucian
-
19th July 2007, 06:39 AM #38
Intermediate Member
- Join Date
- Mar 2007
- Location
- Moinesti, ROMANIA
- Age
- 56
- Posts
- 33
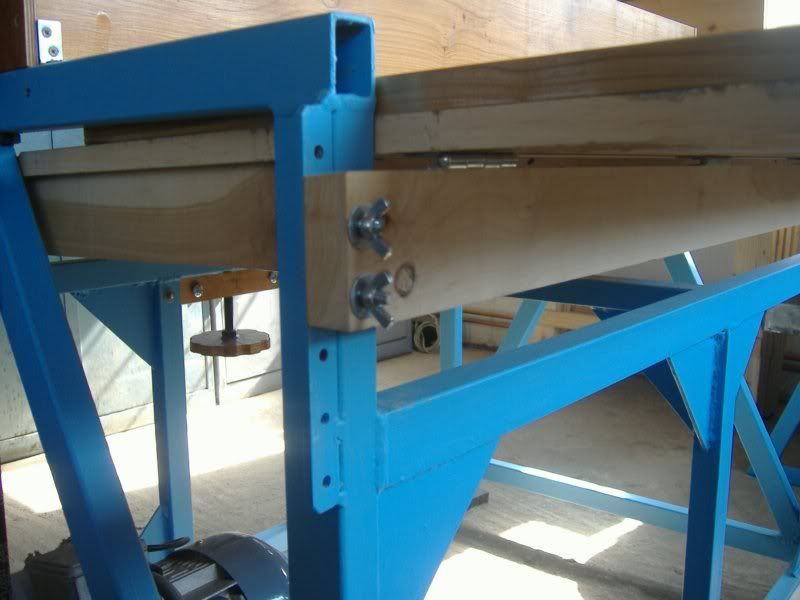
4. Detail of stretching belt device (allow a wide range of V-belt length)
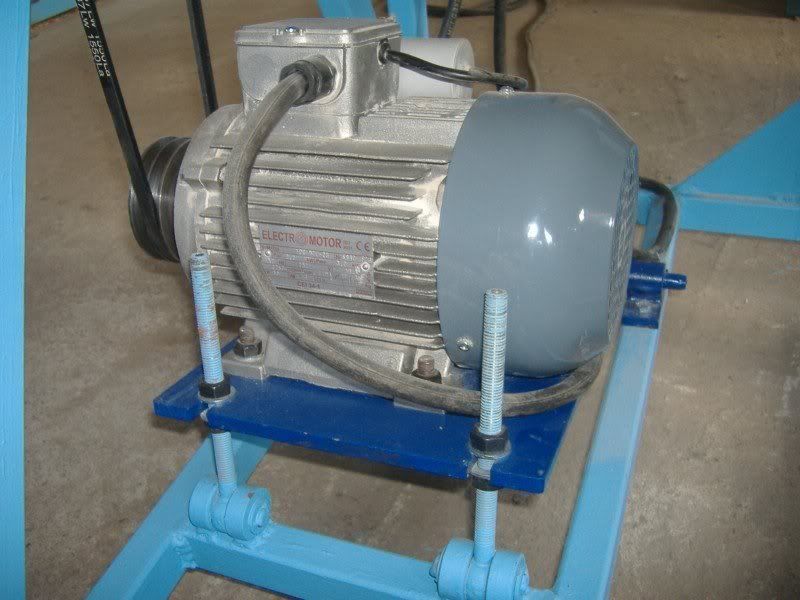
5. Adjusting height (thickness) device
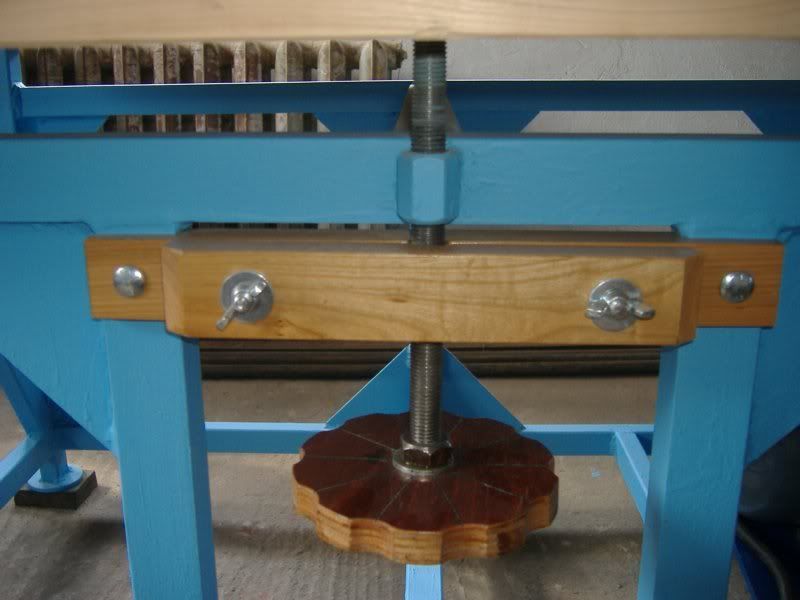
6. Adjusting height (thickness) device - closer view of handling wheel (divided in 10 circular sectors, 1 sector=36 degrees=0.1 mm height adjustment)
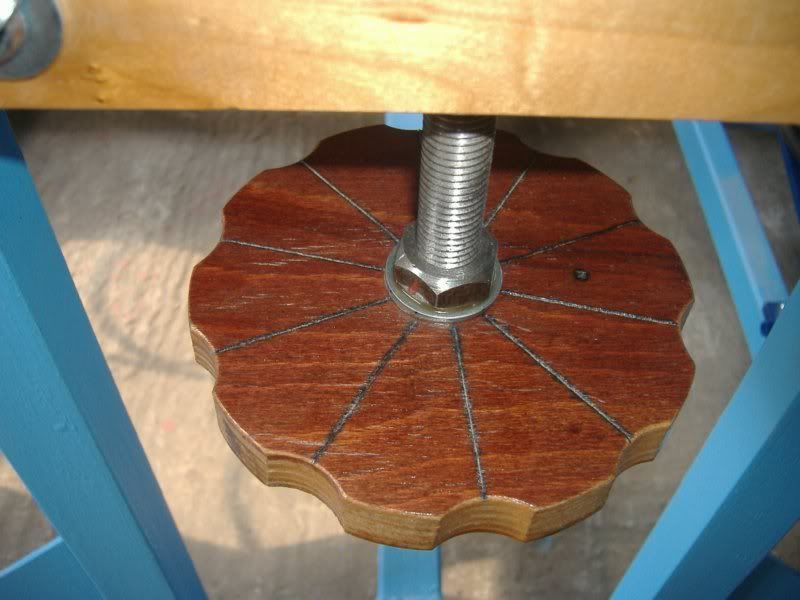 Lucian
-
19th July 2007, 06:58 AM #39
Intermediate Member
- Join Date
- Mar 2007
- Location
- Moinesti, ROMANIA
- Age
- 56
- Posts
- 33
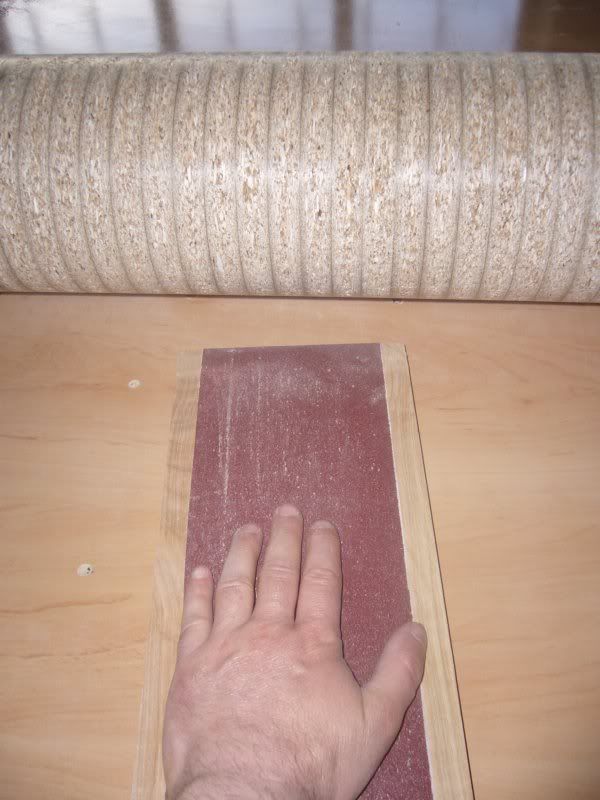
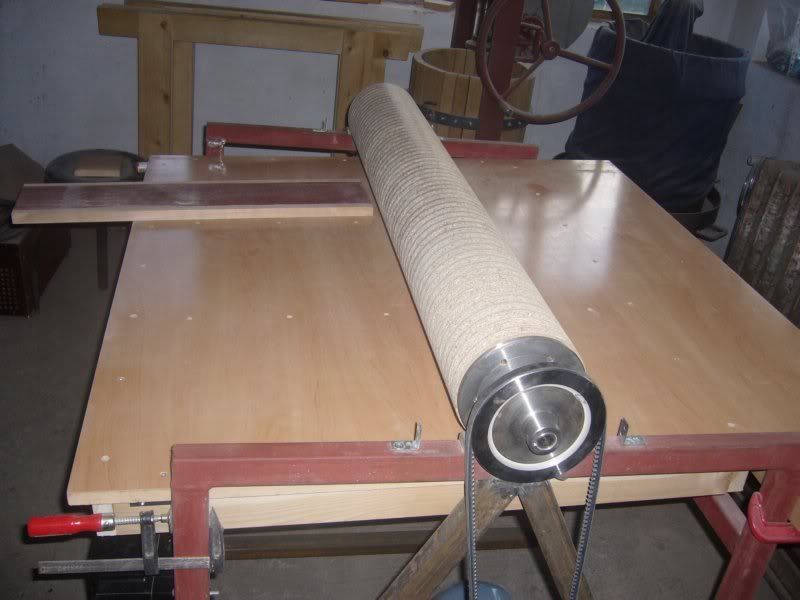
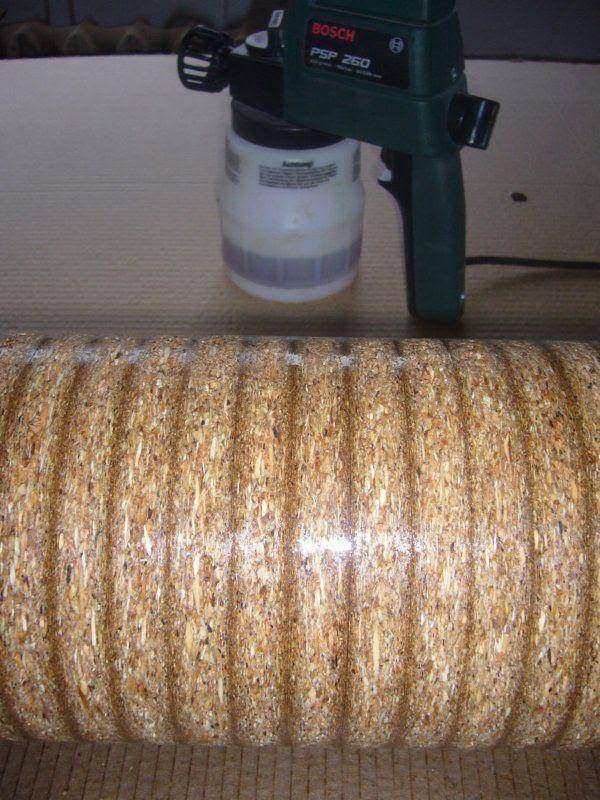
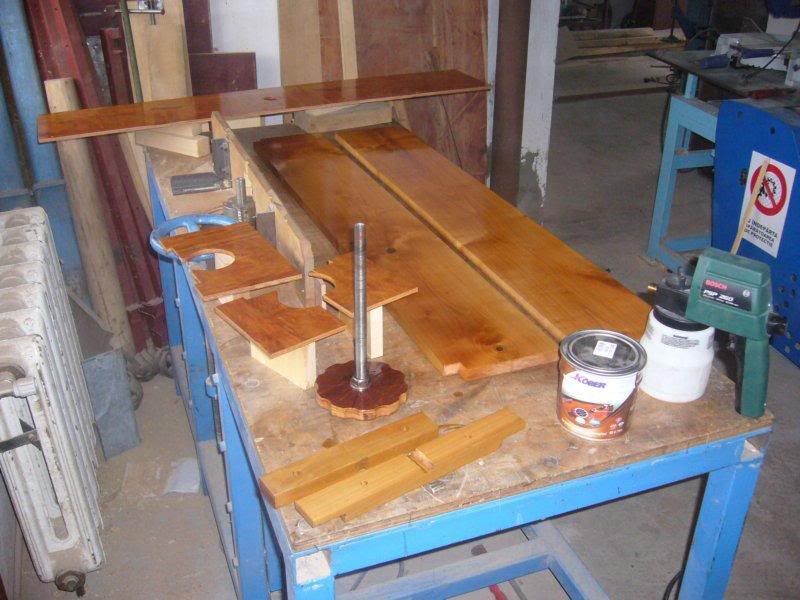
7. Sanding paper convoluted on drum (view from right-above)

8. Sanding paper attached to drum with two hose clamp 150-170 mm (detail)
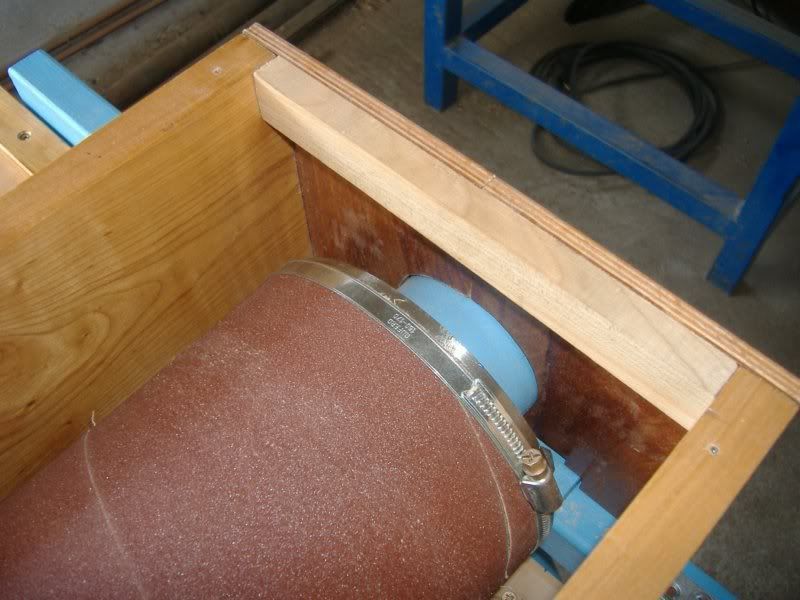
9. Assembly befor attaching the dust hood cover and V-belt guard
 Lucian
-
19th July 2007, 07:05 AM #40
Intermediate Member
- Join Date
- Mar 2007
- Location
- Moinesti, ROMANIA
- Age
- 56
- Posts
- 33
10. V-belt guard placed on table (view from outside)
11. V-belt guard placed on table (view from inside)
12. Final fitting of the assembly
 Lucian
-
19th July 2007, 07:22 AM #41
Intermediate Member
- Join Date
- Mar 2007
- Location
- Moinesti, ROMANIA
- Age
- 56
- Posts
- 33
13. The maximum lenght of the pannel which can be processed is ...
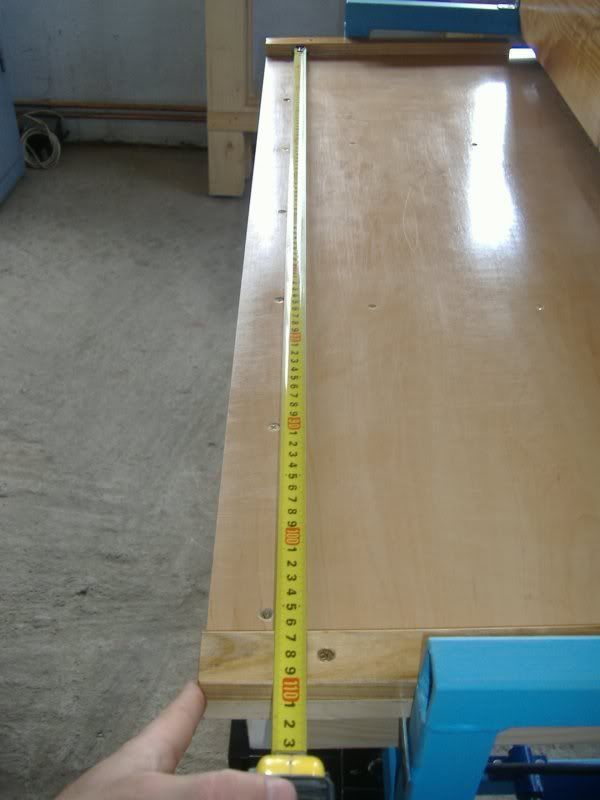
14 ...You can see now in this closer view: 1060 mm (enough for me!)
Do you like my drum sander?
What do you think about the color combinations sky-blue + blue ?
Critics welcomed
Kind regards!Lucian
-
19th July 2007, 10:20 PM #42
SENIOR MEMBER
- Join Date
- Nov 2004
- Location
- Port Pirie SA
- Age
- 52
- Posts
- 3,693
Looks good Lucian, good for doing whole table tops!
....................................................................
")
-
19th July 2007, 10:51 PM #43
GOLD MEMBER
- Join Date
- Apr 2002
- Location
- Brisbane
- Posts
- 2,760
I recon you are going to need some bigger dust extraction ports..... I'd be thinking, 2 x 100mm.
cheersAny thing with sharp teeth eats meat.
Most powertools have sharp teeth.
People are made of meat.
Abrasives can be just as dangerous as a blade.....and 10 times more painfull.
-
19th July 2007, 10:54 PM #44
Not as good as I think I am
- Join Date
- Jun 2007
- Location
- Longreach
- Age
- 58
- Posts
- 741
That is awesome, you are very skilled to do that and I like the finish. One thing puzzles me though, How do you hold the paper on the drum? Is it just wrapped and held at either end by the hose clamps? No glue, velcro etc?
very interested
specialistCheck my facebook:rhbtimber
-
20th July 2007, 12:04 AM #45
SENIOR MEMBER
- Join Date
- Nov 2004
- Location
- Port Pirie SA
- Age
- 52
- Posts
- 3,693
"Is it just wrapped and held at either end by the hose clamps?"
Yep certainly is... probably do a better job than the ones that are shop brought.....................................................................


 Reply With Quote


