

 Thanks: 0
 Likes: 0
 Needs Pictures: 0
 Picture(s) thanks: 0
Results 16 to 30 of 34
Thread: To Fill or Not to Fill
-
11th September 2009, 04:35 PM #16
 Intermediate Member


- Join Date
- Sep 2009
- Location
- Orange
- Posts
- 19
- Post Thanks / Like


I think I just figured it out... I guess that is the pin... The join on our table is just a decorative design....... I'm not sure my father could pull off the pinned miter... He is one of these old dogs that doesn't learn too well, or teach for that matter.
-
11th September 2009, 04:43 PM #17
GOLD MEMBER
- Join Date
- Nov 2003
- Location
- Sydney
- Age
- 54
- Posts
- 891
- Post Thanks / Like
No, the joints had a perfect fit. The dark bit is a Wenge peg. In penetrates the joint from one end to the other. It holds the boards together, so they are impossible to separate.
I always use Bostik 2-part epoxy. It has a clear finish and once it is sanded and finished you can't really see it.
I don't believe in wood fillers. Because you can never get the exact colour to match the wood and you can always see it.Visit my website at www.myFineWoodWork.com
-
11th September 2009, 04:54 PM #18
GOLD MEMBER
- Join Date
- Nov 2003
- Location
- Sydney
- Age
- 54
- Posts
- 891
- Post Thanks / Like
Oh, so how is the joint held together? Biscuit or dowels? Originally Posted by Bledrin

I see that the the table is made of solid wood inside a frame. It does not allow the wood to expend or contract inside the frame. Sooner or later the joint will crack open.Visit my website at www.myFineWoodWork.com
-
11th September 2009, 05:04 PM #19
Intermediate Member
- Join Date
- Sep 2009
- Location
- Orange
- Posts
- 19
- Post Thanks / Like
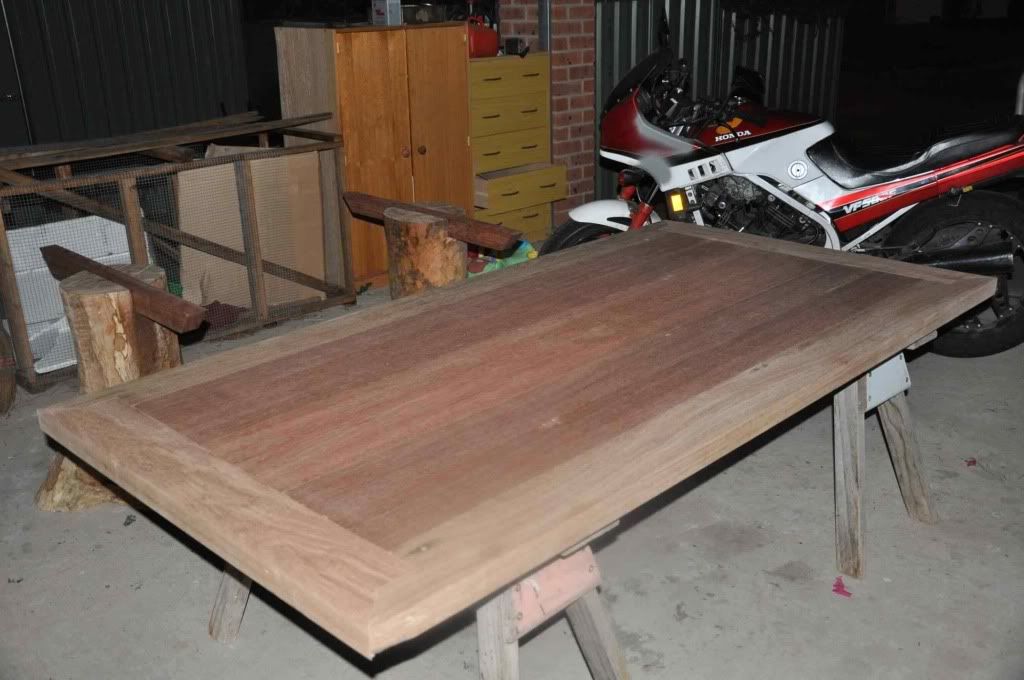
Its not actually solid. The tabletop is a series of 6x2 planks that are joined with a tongue and groove. We ripped grooves into the edges and then glued strips of ply into every second groove to create tongues.. The "frame" is joined the same way but is a different colour hardwood. I believe the joins within the mitres are dowled, but then I wasn't there on that day...
-
11th September 2009, 08:26 PM #20
SENIOR MEMBER
- Join Date
- Dec 2008
- Location
- Eastern Australia
- Posts
- 60
- Post Thanks / Like
My material for the job is moulding and embedding resin. Its made by diggers and you find it in the fibreglass section of Bunnies. Its clear but get a small tin of builders oxide and you can colour it to whatever takes your fancy. Buy the catalyst bottle as well as the tin of resin, sounds daft but they come separate
-
11th September 2009, 08:51 PM #21
Intermediate Member
- Join Date
- Sep 2009
- Location
- Orange
- Posts
- 19
- Post Thanks / Like
thanks for ll the ideas guys... I'll have to make a decision and jump in tomorrow...
-
11th September 2009, 09:30 PM #22
Intermediate Member
- Join Date
- Sep 2009
- Location
- Orange
- Posts
- 19
- Post Thanks / Like
BAD PIC OF THE TABLE TOP AS A WHOLE
-
11th September 2009, 10:23 PM #23
Wood Planner
- Join Date
- Apr 2008
- Location
- Lalla, Tasmania
- Posts
- 0
- Post Thanks / Like
Bledrin
I've tried many methods including clear epoxy and epoxy with sanded dust and I have to say sanded dust from the wood you are using mixed with sanding sealer is the best I've ever got to a match. Nothing is perfect, however, I charge a bloody lot of money for my rocking chairs, that I can't afford them for myself and my clients and family have never picked a filed defect that I've repaired with a mix of sanding dust and sanding sealer.
So step one is sand the wood you are using for your project and gather it in a plastic bag, the finer the better. First add a teaspoon of sanding sealer to a plastic cup. Put a little of the sanding dust in to mix with it. Not too much to dry it out but no too little to keep it liquid but to make it into a paste. The mix will darken the sanding dust just like it does when first applied to wood. Apply to the defects and rub it in with an icecream stick untill it fills the void, then leave over night to dry. In the morning sand gently until it levels with the normal surface. You will note the filler will change colour back to the sanding dust origonal colour or very close to it. Now apply your chosen finish.
I've just done this with red gum over the last few days on the project I'm working on now and I can't tell the difference. But remember it's not perfect always.
SBLast edited by Superbunny; 12th September 2009 at 04:14 PM. Reason: to add
Power corrupts, absolute power means we can run a hell of alot of power tools
-
11th September 2009, 10:55 PM #24
Intermediate Member
- Join Date
- Sep 2009
- Location
- Orange
- Posts
- 19
- Post Thanks / Like
Thanks Super Bunny!
-
12th September 2009, 07:39 AM #25
Grommit
- Join Date
- Aug 2009
- Location
- Clayton
- Posts
- 30
- Post Thanks / Like
I've seen polyester resin used most frequently for a filler with no colour. It tends to conform to whatever color the area its used in is, so cracks will look black and natural but they are filled.
Never been a fan of sawdust, it will work in PVA and similar glues, but I'd try to avoid them as they are hard to sand quite often. Something harder would be a better vehicle, like the sanding sealer. which should have a fair amount of body to it, aside from the sawdust. I'd probably try and make it into a fairly stiff but workable paste and apply it with a filling blade.
Plasti-bond, or any of the other styrene fillers, can be coloured with stainers or universal colourants, it will make the filler go off a lot faster though. Seems to speed up the reaction time.
Regards
-
12th September 2009, 10:42 PM #26
Intermediate Member
- Join Date
- Sep 2009
- Location
- Orange
- Posts
- 19
- Post Thanks / Like
Well I've given the saw dust option a go. Its seriously dark compared to the timber.... I just hope it dries allot lighter. If anyone else is ever looking for an easy way to collect sanding dust, two business cards work a treat...
-
13th September 2009, 11:29 AM #27
Intermediate Member
- Join Date
- Sep 2009
- Location
- Orange
- Posts
- 19
- Post Thanks / Like
ahh crap...
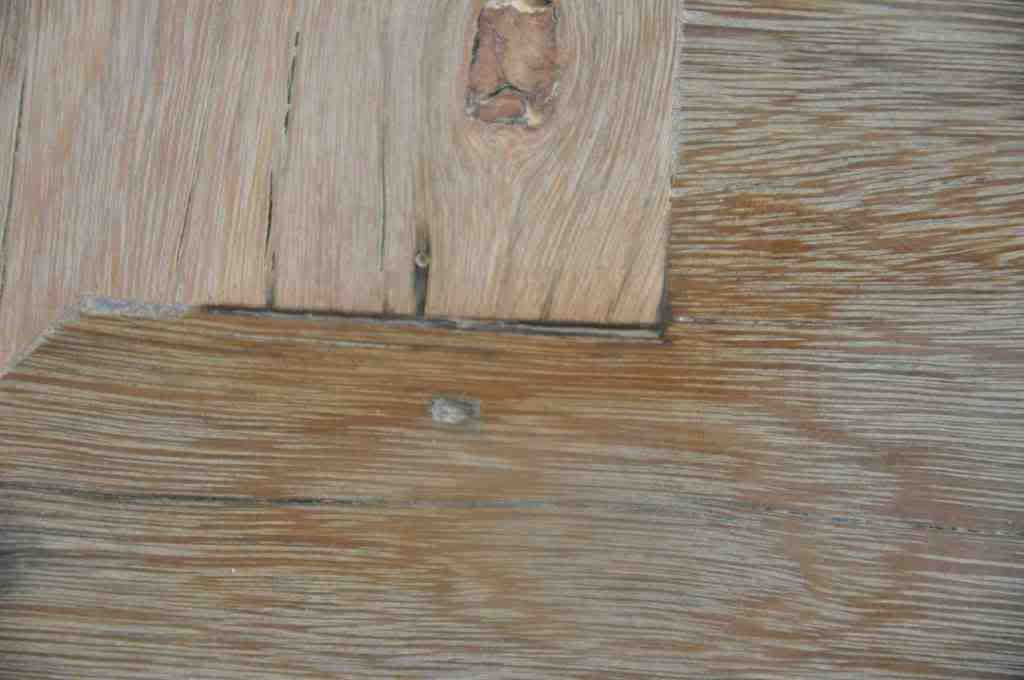
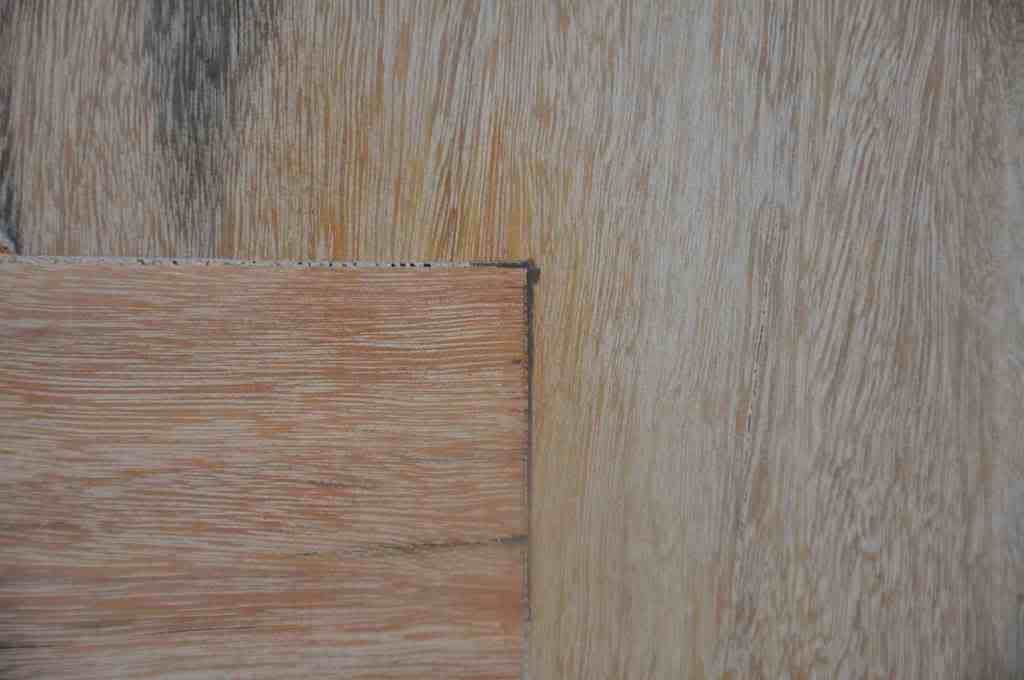
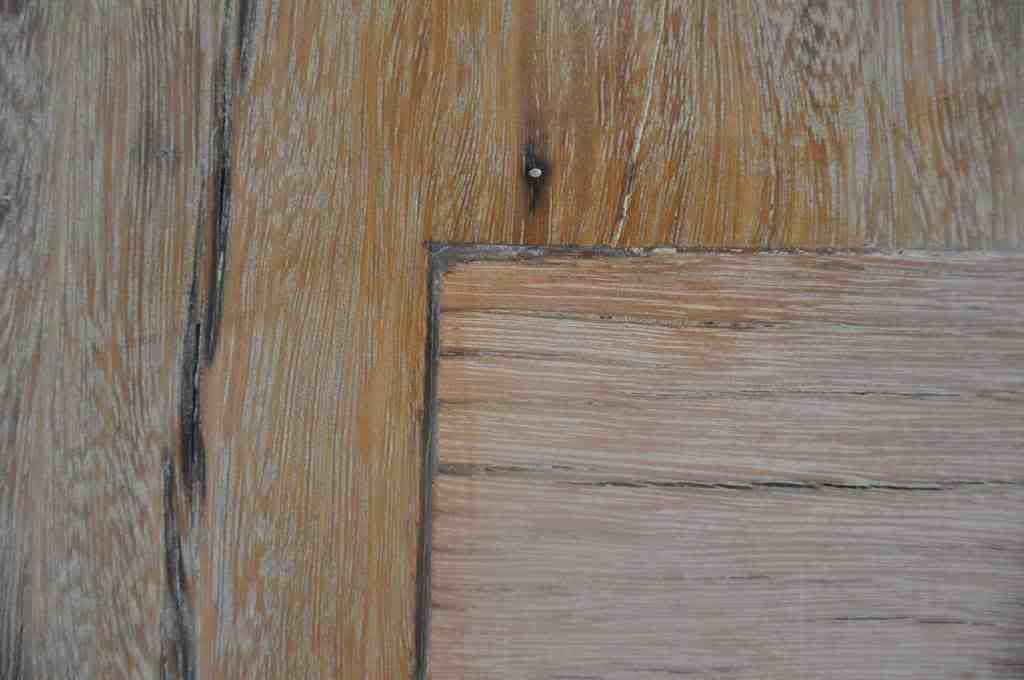
It has dried a completely different colour to the timber.
Obviously I've done a crap job of filling, but even so you see the colour is completely wrong. I added enough sanding dust into the sealer so that it was thick enough to easily work with. Would have this been the problem? Should I have stuck with a teaspoon?
I really want to disguise these dodgy joins as best I can. Time to scratch out the filler and start again. HELP!
-
13th September 2009, 07:45 PM #28
Casual Hero and Philanthropist
- Join Date
- Oct 2005
- Location
- Yass
- Age
- 65
- Posts
- 0
- Post Thanks / Like
I don't think any kind of filler will turn rustic joints into something else. The comments from Superbunny and others would mainly apply to the small gaps and pits in the timber itself, not gaps in a joint.
If I were you, I'd clean out the filler in the joints, finish the table, and enjoy it for what it is - a beautiful piece of furniture made by someone you love, with rustic joinery.
Lots of people pay extra for that look.
Tex
-
13th September 2009, 09:55 PM #29
Wood Planner
- Join Date
- Apr 2008
- Location
- Lalla, Tasmania
- Posts
- 0
- Post Thanks / Like
Well Bledrin, what can I say, I really don't know what went wrong for you, It puzzels me too. I might be wrong, but do I see some sanding sealer in the gaps that has dried a creamy whiteish colour? If so, not enough sanding dust, it must be like a paste. Otherwise, it just don't work on older wood or on some woods. I'll post a pic of something I've done to show you later on when I've got time. Sorry
SBPower corrupts, absolute power means we can run a hell of alot of power tools
-
14th September 2009, 09:06 AM #30
Intermediate Member
- Join Date
- Sep 2009
- Location
- Orange
- Posts
- 19
- Post Thanks / Like
On the surface, what you say make sense, however, it lacks insight into the particulars of the relationship. Lets stick to the gaps in the table and I'll take care of the gaps in my Family... Originally Posted by Tex B

 Reply With Quote


Similar Threads
-
Fill
By Ross in forum LANDSCAPING, GARDENING, OUTDOORSReplies: 1Last Post: 4th November 2007, 12:37 PM -
Always fill up on a cold day
By silentC in forum NOTHING AT ALL TO DO WITH RENOVATIONReplies: 50Last Post: 15th July 2006, 07:41 PM
Bookmarks