

 Thanks: 0
 Likes: 0
 Needs Pictures: 0
 Picture(s) thanks: 0
Results 1 to 8 of 8
-
18th June 2008, 10:00 AM #1
 What... you mean it's not 1792?


- Join Date
- Oct 2006
- Location
- Melbourne
- Posts
- 0
- Post Thanks / Like

 Restoration of mahogany dining table leg
I found some photos at the weekend of some of my past efforts and I thought I'd share some of them on these forums. I've already posted in the clock section. I'm an average wood worker, but a very inept photographer and to compound the problem, these images are scans of old scratched photos (some of them 30+ years old) from the bottom of a box, so please excuse the quality.
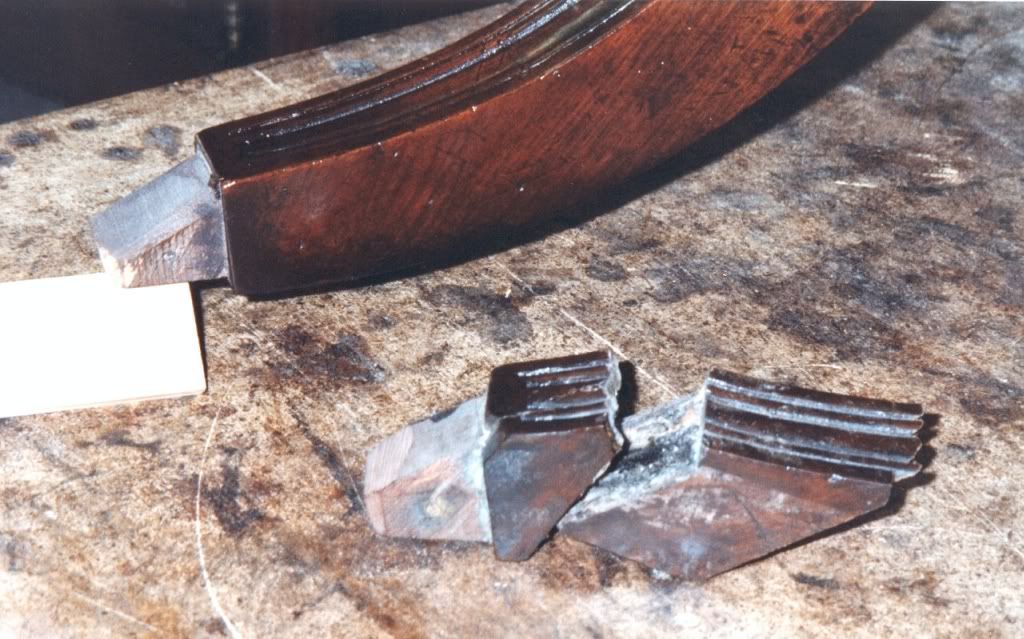
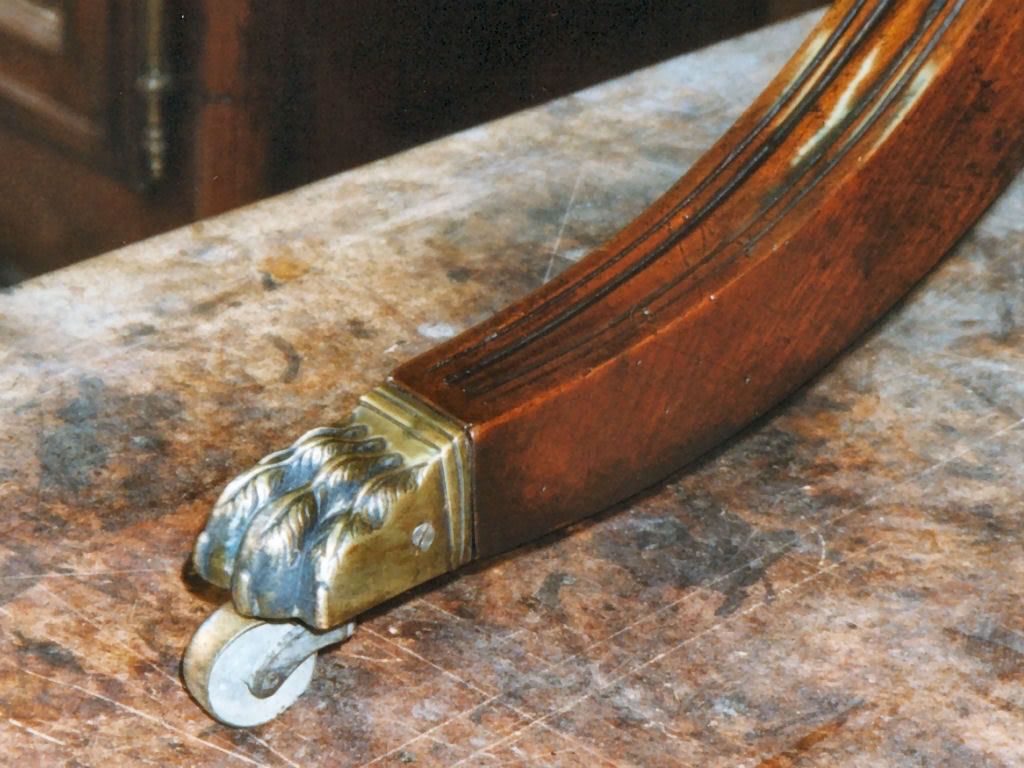
The toe of one of the splayed legs on this dining table pedestal had been broken off on at least two occasions and the successive repairs including screwing and later gluing with PVA necessitated a more permanent repair.
The glued tip was already off when I received the table and after scrutiny, an earlier repair consisting of three screws slightly higher up the leg meant a considerable amount of the toe had to be removed to get back to sound timber.
The leg was trimmed and a new piece of mahogany grafted on.
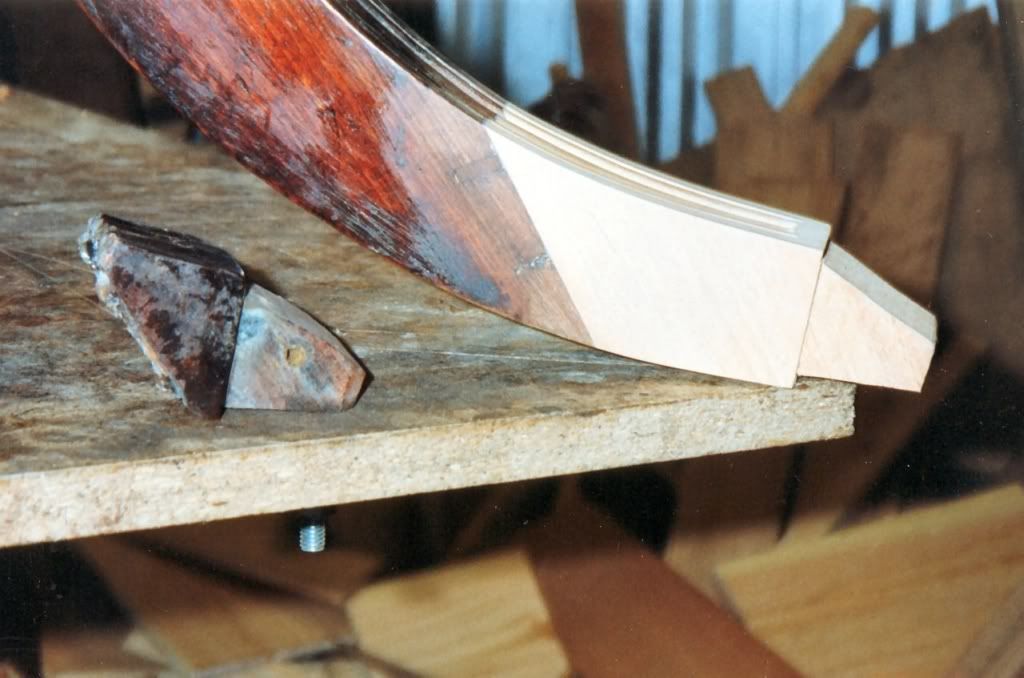
The stopped reed moulding was formed in the new section.
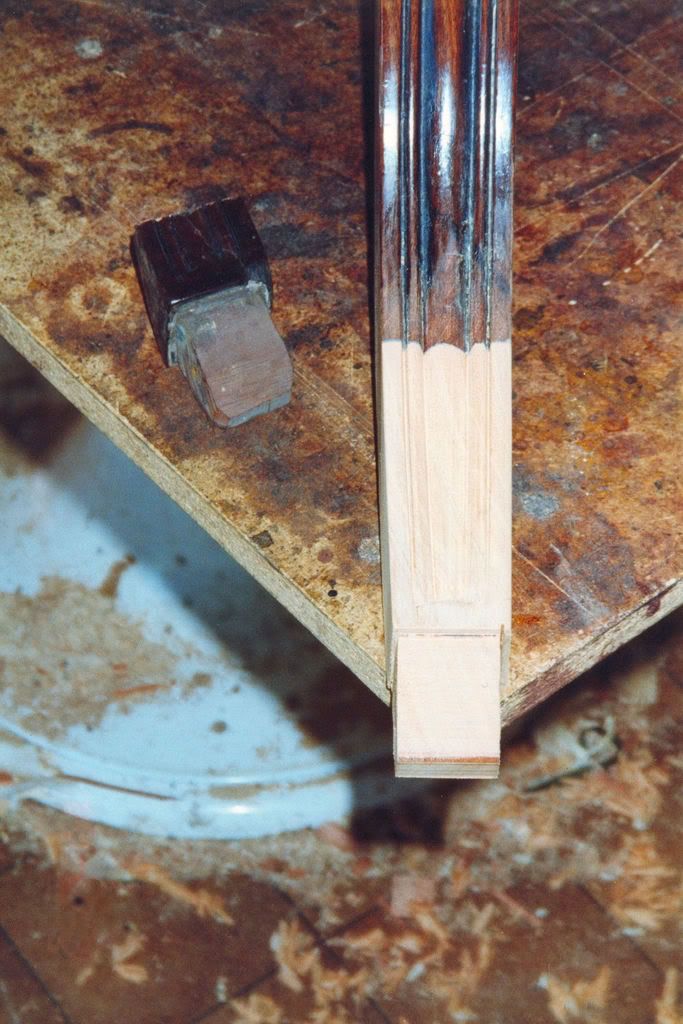
Preliminary colouring was done to blend the new with the old.
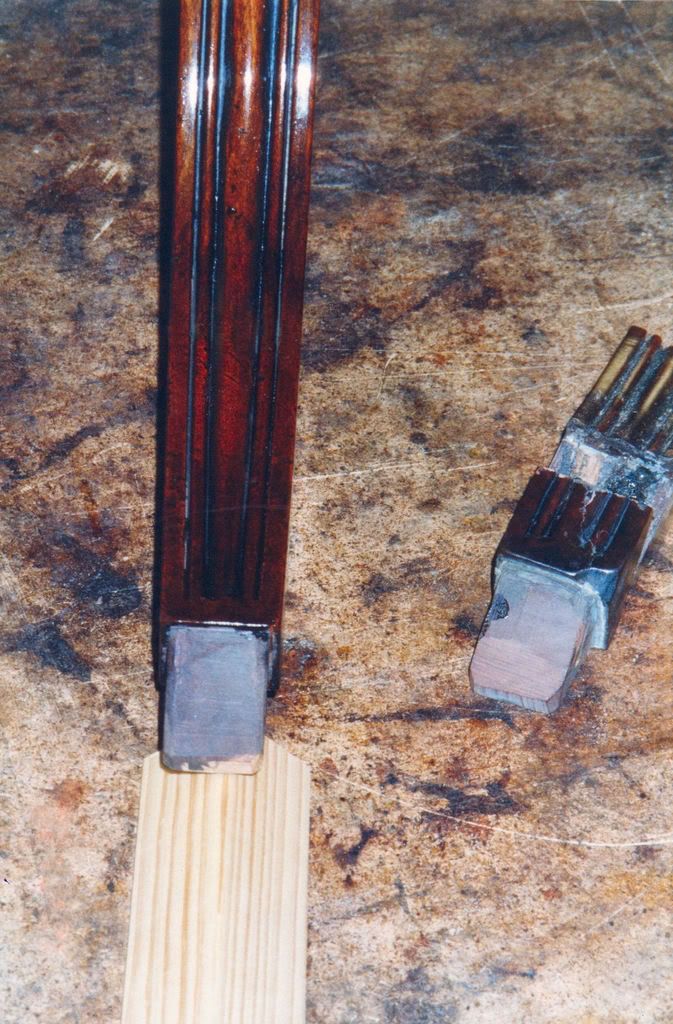
The castor was replaced and the whole table given a good waxing.
-
18th June 2008, 05:32 PM #2
dabbler
- Join Date
- Feb 2008
- Location
- far south coast nsw
- Age
- 85
- Posts
- 1
- Post Thanks / Like
photos
that is a top job

-
18th June 2008, 05:52 PM #3
What... you mean it's not 1792?
- Join Date
- Oct 2006
- Location
- Melbourne
- Posts
- 0
- Post Thanks / Like
WOW! Six thumbs up! Thanks.
 .
.
I know you believe you understand what you think I wrote, but I'm not sure you realize that what you just read is not what I meant.
Regards, Woodwould.
-
18th June 2008, 06:05 PM #4
Shed Rat
- Join Date
- Jan 2006
- Location
- Paradise on the Murray
- Age
- 58
- Posts
- 109
- Post Thanks / Like
Woodwould, please do not refer to yourself as an AVERAGE wooderworkers
 It makes the rest of feel inept
 Cheers,
Howdya
Proudly supporting research into the therapeutic benefits of the Friday Thread
-
19th June 2008, 12:03 PM #5
New Member
- Join Date
- Jun 2008
- Location
- US
- Posts
- 1
- Post Thanks / Like
Woodwould -
If I may ask, how did you clamp the grafted wood onto the table leg?
I have a similar problem with a table leg that has broken, and I believe I can glue it back together, but am not sure how to hold the joint together.
Thank you for the excellent example!
-
19th June 2008, 12:29 PM #6
What... you mean it's not 1792?
- Join Date
- Oct 2006
- Location
- Melbourne
- Posts
- 0
- Post Thanks / Like
Re-gluing the broken tip of a saber leg is actually more difficult than gluing on an entirely new piece as illustrated above.
Obviously the two pieces need to be clamped perpendicular to the joint. This is tricky with a sabre leg as you have discovered. There are several ways to tackle the problem though.
If the fibres in the joint are tight, then some glue may be all that's required in conjunction with strategically placed masking tape to pull the joint together.
If the joint wont sit nicely without pressure being applied, then clamping will be necessary.
The all-clamps method: If you have plenty of clamps, position one horizontally on the underside of the main leg and one horizontally above the broken toe. You should then be able to clamp the joint firmly with additional clamps bearing on the ones attached directly to the wood.
The block method: If you can't obtain sufficient pressure with clamps alone, then some wooden blocks attached to the leg parts will offer better purchase for the clamps.
You will need to shape two blocks to the profile of the leg parts (in place of the clamps as described above) and ensure the clamping surfaces are parallel with the break/joint. To attach the blocks to the leg, you can either glue them on temporarily. Hot melt glue is one possibility assuming the finish on the leg will withstand the removal of the glue afterwards (not so important if you'll be refinishing the whole piece). If the finish has already been removed then horse sauce (animal glue) has worked for me for a few decades.
Which ever method you adopt, be sure to clamp a couple of waxed (to prevent the glue from sticking) flat blocks either side of the leg (assuming a similar 'square' profile as the example in the pictures above) to perfectly align the broken piece.
Good luck with it all and post some pictures of the results please so we can see how you managed.
.
I know you believe you understand what you think I wrote, but I'm not sure you realize that what you just read is not what I meant.
Regards, Woodwould.
-
22nd June 2008, 07:08 PM #7
Jim
- Join Date
- Feb 2008
- Location
- Victoria
- Posts
- 596
- Post Thanks / Like
Fascinating. What sort of stains and what process to you go through to match the colours?
Jim
-
22nd June 2008, 07:41 PM #8
What... you mean it's not 1792?
- Join Date
- Oct 2006
- Location
- Melbourne
- Posts
- 0
- Post Thanks / Like
I honestly don't remember that exact job Jim, but it would most likely have involved a natural water-based stain, possibly some shellac and waxes.
.
I know you believe you understand what you think I wrote, but I'm not sure you realize that what you just read is not what I meant.
Regards, Woodwould.


 Reply With Quote

Bookmarks